
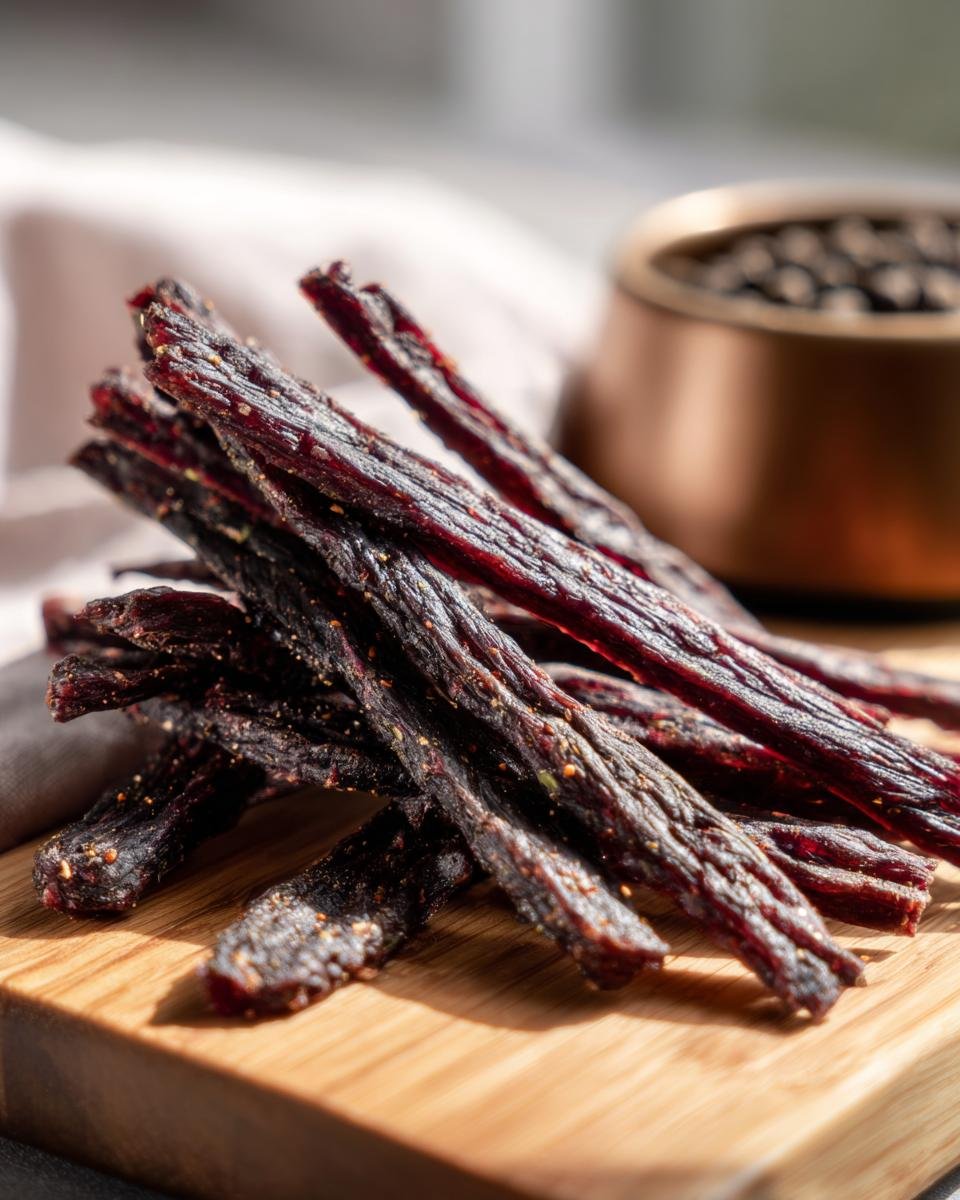
You know, I’m always on the hunt for snacks that are both delicious and actually good for me. It’s a tough quest, right? That’s why I got so excited when I perfected this Turkey Green Bean Lean Jerky recipe. Forget those store-bought bags loaded with mystery ingredients! This homemade version is ridiculously simple, packed with protein, and has this surprisingly satisfying texture. Honestly, my first batch was a kitchen experiment born out of a need for good travel snacks, and wow, did it deliver! It’s become my go-to for quick, healthy munching.
Why You’ll Love This Turkey Green Bean Lean Jerky
Seriously, this recipe checks all the boxes! Here’s why you’ll be making this Turkey Green Bean Lean Jerky again and again:
- It’s unbelievably easy to whip up, even for us busy folks.
- Super healthy – it’s lean, protein-packed, and low in fat.
- The flavor is just right – savory and satisfying without being overpowering.
- Perfect for portion control and healthy snacking anywhere.
- You control exactly what goes in it – no weird stuff!
- It’s incredibly versatile; make it your own with different spices.
Ingredients for Your Turkey Green Bean Lean Jerky
Alright, let’s get down to what you’ll need for this awesome Turkey Green Bean Lean Jerky. Don’t worry, it’s a super short list!
Here’s what to grab:
- 1 pound ground turkey (go for lean, it’s right there in the name!)
- 1 cup fresh green beans, all trimmed up and chopped *really* finely – this is important!
- 1/4 cup low-sodium soy sauce (keeps the salt in check)
- 1 tablespoon Worcestershire sauce (for that extra savory kick)
- 1 teaspoon garlic powder
- 1 teaspoon onion powder
- 1/2 teaspoon black pepper (add a bit more if you like things zesty!)
Equipment Needed for Perfect Turkey Green Bean Lean Jerky
To make your Turkey Green Bean Lean Jerky a breeze, you’ll want a few trusty kitchen tools. Make sure you have:
- A good-sized mixing bowl for combining everything.
- Baking sheets – you might need a couple depending on how thin you spread it!
- Plenty of parchment paper to line those sheets. This is a lifesaver for cleanup!
- A spatula or your hands for spreading the mixture thinly.
- A place to cool your jerky completely.
Step-by-Step Guide to Making Turkey Green Bean Lean Jerky
Alright, let’s get down to business and make some amazing Turkey Green Bean Lean Jerky! It’s honestly not hard at all, just follow these simple steps. You’ll be munching on healthy goodness in no time! Check out how to make other tasty recipes while you wait for this one to dry!
Prepping Your Turkey Green Bean Lean Jerky Base
First things first, let’s get all those yummy flavors mingled together. Grab your mixing bowl and dump in that pound of ground turkey. Then, add your super-finely chopped green beans – I can’t stress enough how important it is to get them small! Follow that up with the soy sauce, Worcestershire sauce, garlic powder, onion powder, and black pepper. Now, get your hands in there (or use a sturdy spoon!) and mix it all up really, really well. You want everything to be totally combined so every bite is perfect.
Spreading and Baking Your Turkey Green Bean Lean Jerky
Okay, time to get this ready for the oven! You’ll want to preheat your oven to a nice low 170°F (77°C). Grab your baking sheets and line them well with parchment paper – trust me, this makes life so much easier later. Now, take your turkey mixture and spread it out super thin onto the parchment paper, aiming for about 1/8 inch thick. You can use a rolling pin or just your clean hands for this. The thinner you spread it, the quicker it’ll dry out and the crispier your jerky will be! Pop those sheets into the oven and let them bake for a good 4 to 6 hours. Keep an eye on it, especially towards the end, because ovens can be a bit different. You’re looking for it to be dry and firm to the touch.

Cooling and Storing Your Delicious Turkey Green Bean Lean Jerky
Once your Turkey Green Bean Lean Jerky looks beautifully dried and feels firm, take it out of the oven. Now, here’s a crucial step: let it cool *completely* on the baking sheets. Trying to break or cut it while it’s hot just leads to a crumbly mess. Once it’s totally cool, you can break it into bite-sized pieces or cut it up into strips – whatever you fancy! Store your homemade jerky in an airtight container. It’ll stay good at room temperature for about a week, but if you want it to last longer, just pop it in the fridge and it’ll keep for a few weeks. Enjoy!
Tips for the Best Turkey Green Bean Lean Jerky
Okay, so you’ve got the basics down, but let’s talk about making your Turkey Green Bean Lean Jerky absolutely *perfection*. A few little tricks can make all the difference, trust me! It’s not just about following the recipe; it’s about knowing how to get that fantastic jerky texture and flavor every single time. We want it to be tasty, satisfying, and something you’ll be proud to snack on or share. Plus, knowing these little secrets will make you feel like a jerky pro! Check out these tips for more healthy snacks you can make, and don’t forget to try this other recipe too!
Achieving the Right Texture in Your Turkey Green Bean Lean Jerky
The texture is everything with jerky, right? For this Turkey Green Bean Lean Jerky, aim for it to be dry and firm, but not so brittle that it shatters. The key is that low oven temperature and spreading it thinly. If it’s drying too fast on the edges, you can slightly tent the baking sheet with foil. Also, make sure it’s *completely* cooled before storing; that helps it firm up properly without getting chewy or gummy. Sometimes I even leave it out for an extra hour just to be sure!
Flavor Variations for Your Turkey Green Bean Lean Jerky
While this basic Turkey Green Bean Lean Jerky is amazing, don’t be afraid to play with it! Want a little heat? Toss in some red pepper flakes with the ground turkey. Love a smoky flavor? A tiny pinch of smoked paprika does wonders. You could even try adding a little bit of ginger powder for a different kind of zing. Or, for something a bit more adventurous, consider adding a splash of sriracha instead of or alongside the soy sauce. experiment and find what makes your jerky sing!
Frequently Asked Questions About Turkey Green Bean Lean Jerky
Got questions about making this super easy Turkey Green Bean Lean Jerky? I’ve got you covered! Here are some of the things folks ask most often, so you can make your jerky perfectly. If you have more questions, feel free to reach out!
Can I Make Turkey Green Bean Lean Jerky Without an Oven?
You totally can! If you have a food dehydrator, that’s your best bet. Arrange the mixture on the dehydrator trays like you would on baking sheets and follow your dehydrator’s instructions, usually around 150°F (65°C) for 4-6 hours. It’s a great alternative!
How Long Does Turkey Green Bean Lean Jerky Last?
Great question! Properly dried Turkey Green Bean Lean Jerky will last about a week at room temperature if stored in an airtight container. For longer storage, keeping it in the fridge is your best bet – it can last for a few weeks that way. Just make sure it’s completely cooled before you seal it up!
What is the Best Way to Chop the Green Beans for Jerky?
This is key for good texture! I find using a sharp knife and just chopping them really, really fine works best. You want them almost minced so they blend seamlessly into the turkey mixture. A food processor can work in a pinch, but be careful not to turn them into a paste – you still want little flecks!
Nutritional Information for Turkey Green Bean Lean Jerky
Just so you know, the nutritional facts for homemade Turkey Green Bean Lean Jerky are approximate and can change depending on brands and exact portion sizes. But for a standard serving (about 1 ounce), you can generally expect something like this:
Per 1-ounce serving:
- Calories: Around 80
- Fat: About 2g
- Saturated Fat: Roughly 1g
- Carbohydrates: Around 3g
- Protein: A solid 12g!
- Sodium: Usually about 300mg (thanks to the low-sodium soy sauce!)
It’s a pretty lean, protein-packed snack with not a lot of carbs or fat, making it a great choice when you need something satisfying!

Share Your Turkey Green Bean Lean Jerky Creations!
So, have you made your own batch of this amazing Turkey Green Bean Lean Jerky yet? I’d absolutely LOVE to hear all about it! Did you try any fun flavor twists? Did you snap any pictures of your creations? Please share your experience and your photos in the comments below! And if you loved this recipe, please give it a star rating – it really helps others find it. You might also want to check out more delicious recipes or this other favorite snack idea!

Turkey Green Bean Lean Jerky
- Total Time: 6 hours 15 min
- Yield: Approximately 1/2 pound 1x
- Diet: Low Fat
Description
A simple recipe for making lean turkey and green bean jerky.
Ingredients
- 1 pound ground turkey
- 1 cup fresh green beans, trimmed and finely chopped
- 1/4 cup low-sodium soy sauce
- 1 tablespoon Worcestershire sauce
- 1 teaspoon garlic powder
- 1 teaspoon onion powder
- 1/2 teaspoon black pepper
Instructions
- Preheat your oven to 170°F (77°C). Line baking sheets with parchment paper.
- In a bowl, combine the ground turkey, chopped green beans, soy sauce, Worcestershire sauce, garlic powder, onion powder, and black pepper. Mix thoroughly until well combined.
- Spread the mixture thinly and evenly onto the prepared baking sheets, about 1/8 inch thick. You can use a rolling pin or your hands.
- Bake for 4 to 6 hours, or until the jerky is dry and firm. The exact time will depend on your oven and the thickness of the jerky.
- Once baked, remove from the oven and let it cool completely on the baking sheets.
- Break or cut the jerky into desired pieces. Store in an airtight container at room temperature for up to a week, or refrigerate for longer storage.
Notes
- Ensure the green beans are very finely chopped to integrate well with the turkey mixture.
- For a spicier jerky, add a pinch of red pepper flakes to the mixture.
- Check the jerky periodically during baking to prevent over-drying.
- Prep Time: 15 min
- Cook Time: 4-6 hours
- Category: Snack
- Method: Baking
- Cuisine: American
Nutrition
- Serving Size: 1 ounce
- Calories: 80
- Sugar: 1g
- Sodium: 300mg
- Fat: 2g
- Saturated Fat: 1g
- Unsaturated Fat: 1g
- Trans Fat: 0g
- Carbohydrates: 3g
- Fiber: 1g
- Protein: 12g
- Cholesterol: 40mg
Keywords: turkey jerky, green bean jerky, lean jerky, homemade jerky, healthy snack, dried turkey