
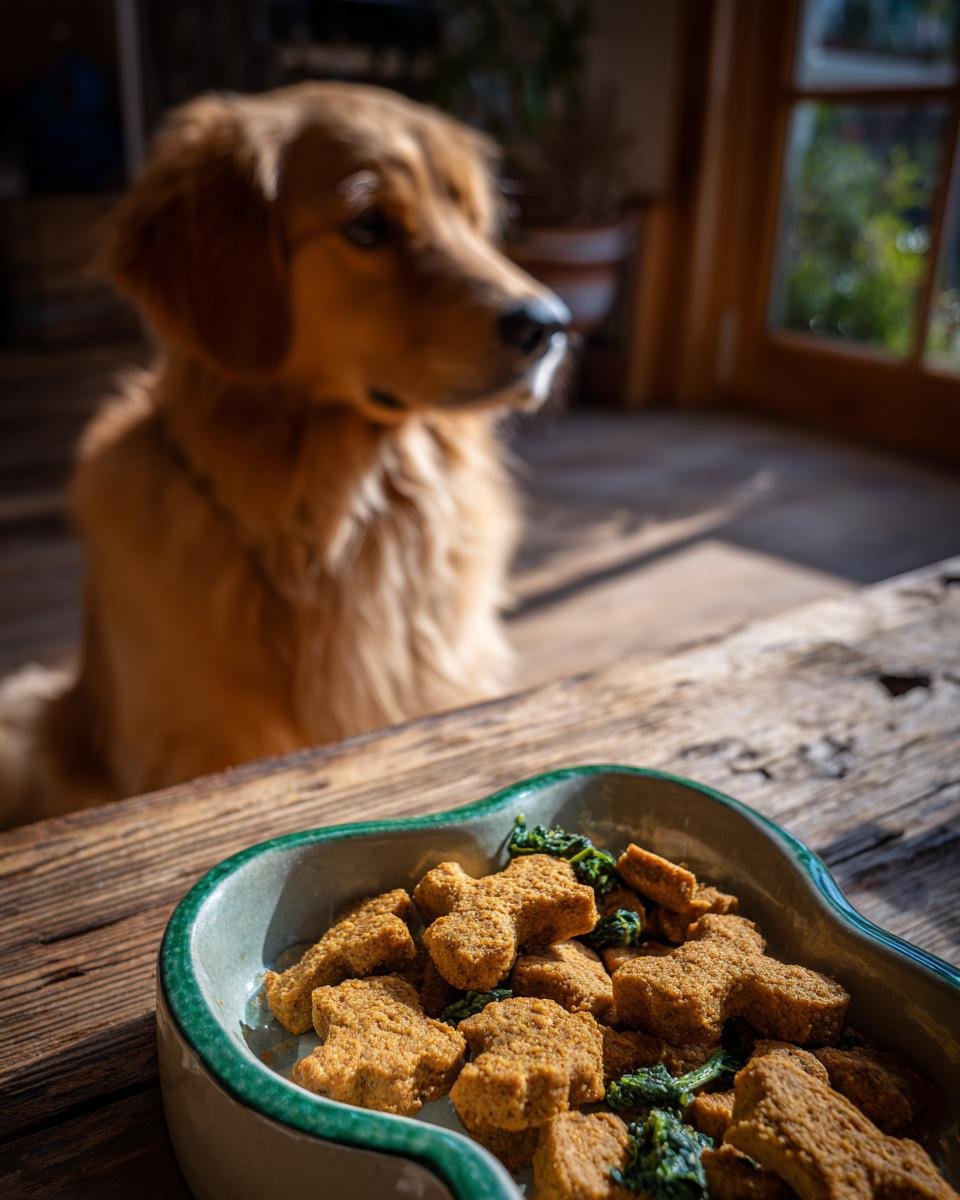
Listen, if your dog is starting to slow down on those neighborhood walks or seems a little stiff getting up off the cool kitchen tile, we need to talk joint support—fast! I learned this the hard way when my old guy, Buster, started skipping his evening zoomies. That’s when I doubled down on making sure his meals were packed with stuff that actually helps, not just filler. That’s why I am obsessed with this recipe for **Homemade Chicken and Spinach Joint Support Kibble**.
It’s baked, which is so much easier than dealing with dehydrators or complicated slow-cooking methods. Seriously, it takes less time than watching a whole episode of my favorite show. It’s just good, whole food, baked right onto a sheet pan so clean up is a breeze. Trust me, when you see how much more enthusiastic your furry best friend gets about mealtime, you’ll understand why this is my go-to recipe. It makes giving them that extra boost of joint love simple and totally tasty for them. If you’ve ever looked into supplements, this recipe incorporates a lot of those helpful ingredients right into their daily bowl. You can even see how we use spices like turmeric in other fun ways, like in this great golden paste recipe!
Why This Homemade Chicken and Spinach Joint Support Kibble Works (E-E-A-T Focus)
When you’re making food for your dog, especially when you’re targeting something specific like joint comfort, you need to know *why* you are using certain ingredients. It’s not just about throwing chicken in a bowl, right? We want every bite to be doing real work! That’s where the quality stuff comes in. The protein from the chicken gives your dog the building blocks they need for strong muscles supporting those joints. And spinach? It’s packed with vitamins that keep everything running smoothly.
But where the real magic happens for mobility is in the fats and spices. We pack this recipe with flaxseed and that essential fish oil. These deliver those wonderful Omega-3 fatty acids that really help calm down inflammation, which is huge for an older dog or one that’s really active. This is why I have so much faith in these batches of **Homemade Chicken and Spinach Joint Support Kibble**.

The Power of Turmeric and Fish Oil in Homemade Chicken and Spinach Joint Support Kibble
If I could only pick one ingredient for anti-inflammatory power, it would be turmeric. That gorgeous golden spice is a superstar in the dog-health world. It works hand-in-hand with the fish oil we add. Now, just so you know, turmeric needs fat to really get absorbed well by the body—that’s why we don’t skimp on the fish oil or the natural fats in the chicken!
I always make sure the turmeric is fresh and finely ground before hitting the bowl. You can check out how we use this powerhouse combination in something totally different, like our tasty chicken and parsley jerky recipe, too. It’s all about delivering those good vibes where they count!
Gathering Ingredients for Homemade Chicken and Spinach Joint Support Kibble
Okay, let’s talk about what goes into making this great food for your pup! The list is short, which I love, because it means fewer trips to the store and more time spent with the dog park hero, Buster. We are using simple, honest stuff here—chicken, grains, greens, and those awesome supplements. Just make sure you prep everything just right before you start mixing, or the moisture level will get all weird on you!
When you grab your ingredients for your batch of **Homemade Chicken and Spinach Joint Support Kibble**, pay close attention to the state they need to be in—we aren’t using raw chicken here, or soup straight from the can! Here is the essential lineup:
- 1 cup cooked, shredded chicken breast
- 1 cup cooked brown rice
- 1/2 cup cooked spinach, finely chopped
- 1/4 cup ground flaxseed
- 2 tablespoons fish oil
- 1 tablespoon ground turmeric
- 1/2 cup water or low-sodium chicken broth
Ingredient Substitutions for Your Homemade Chicken and Spinach Joint Support Kibble
Sometimes you run out of something, or maybe your dog has a mild intolerance to one thing. That’s fine! The most common swap I allow is the grain. If you don’t have brown rice on hand, cooked quinoa works beautifully instead. But listen up: if you swap your grain, you must adjust your liquid carefully! Quinoa is a little thirstier than rice, so you might need an extra splash of that broth.
If you are watching fat intake closely, sometimes owners ask about cutting the fish oil, but please don’t do that if you are focusing on joint health for your **Homemade Chicken and Spinach Joint Support Kibble**! That oil is doing heavy lifting for inflammation. Use these swaps carefully, and remember the goal is a mixture sturdy enough to bake flat.

Step-by-Step Instructions for Baking Homemade Chicken and Spinach Joint Support Kibble
Okay, once you have all your ingredients prepped—chicken shredded, spinach chopped, everything measured out—it’s time for the fun part! Don’t worry about getting fancy here; this is straightforward cooking, even if you think you’re not a baker. The oven is set to a nice low temperature, 300°F (150°C), which is perfect because we aren’t really cooking it—we are drying it out to make it kibble-like.
First things first, get that baking sheet lined with parchment paper. I’m telling you, do not skip that parchment. Scraping baked-on chicken mix off a pan is my personal version of kitchen torture! Once your sheet is ready, toss everything—the chicken, rice, spinach, flaxseed, fish oil, and turmeric—into a jumbo mixing bowl. Seriously, use your biggest bowl so you have room to really get your hands in there.
Now we’re going to get into the mixing sequence. The heat is low and slow: bake this batch of **Homemade Chicken and Spinach Joint Support Kibble** for about 30 to 40 minutes. You are aiming for it to feel totally dry to the touch when it comes out. Let it cool completely before you try to smash it into those little nugget shapes. If you try to break it while it’s hot, it will just be a mushy mess, so patience is key here!
If you want to see another great use for turmeric in treats, check out my recipe for chicken and turmeric anti-inflammation jerky—it’s another winner!
Achieving the Right Consistency When Making Homemade Chicken and Spinach Joint Support Kibble
This is where most people get a little nervous, I think. We are adding liquid, but we aren’t making soup! You are adding that 1/2 cup of water or broth slowly, maybe a splash at a time. The goal is to get the whole mixture to hold together when you squeeze a chunk of it in your fist. It should look moldable, like very thick playdough.
If you add too much liquid, don’t panic! Just spread it thinner on the baking sheet, and it will take a few extra minutes in the oven to dry out. But if it’s too crumbly and won’t stick at all, add just a tiny bit more broth—a tablespoon at a time—until you can firmly press it and it stops falling apart. When you spread it thinly, about 1/4 inch thick, you ensure even drying for that perfect kibble crunch.
Tips for Perfect Homemade Chicken and Spinach Joint Support Kibble
Now that you know the steps, let me give you the little secret sauce tricks that prevent sad, half-baked mush! These tips are what took me from ‘okay’ batches to batches that Buster practically drools over. It’s all about managing moisture and making the most of your baking surface. If you nail these few things, your **Homemade Chicken and Spinach Joint Support Kibble** will come out perfectly crisp every time.
First up, the thickness! It is crucial that you spread that mixed goodness as thinly and evenly as possible. I aim for right about 1/4 inch, max. If your mix is too thick, the center stays gummy while the edges burn trying to dry out. If you have a very large sheet pan, use it! Spreading it thin means the heat penetrates evenly, making sure every tiny piece of kibble is uniformly dried.
My second big piece of advice is about cooling. Seriously, put your hands away when it comes out of the oven! You absolutely must let the entire sheet cool completely—I mean, room temperature cold—before you try to break it up. If you try to smash it even slightly warm, the fats haven’t fully set, and you end up with sticky patches rather than crunchy bits. Wait for it, I promise it’s worth it.
Finally, when it comes to breaking it down, don’t stress about making every piece the exact same size. If you want super tiny pieces for little dogs or training rewards, use a sharp knife and score the surface *before* baking. For chunkier pieces, just use your hands after it’s totally cool. It’s supposed to look rustic and homemade, not machine-cut!
We use similar principles when we build up our complete meals, like this great chicken and quinoa strong body meal, ensuring every ingredient blends perfectly!
Storage and Making Ahead with Homemade Chicken and Spinach Joint Support Kibble
Okay, so you’ve successfully baked a huge batch of this fantastic joint food! Now, how do we keep it perfect? We don’t want all that hard work—and all those wonderful fish oils—going stale or—heaven forbid—getting slimy in the bowl. The whole point of making **Homemade Chicken and Spinach Joint Support Kibble** is that you can batch cook, so storage is super important.
For short-term goodness, stick the cooled kibble in an airtight container and pop it right into the refrigerator. Because we baked out most of the moisture, this keeps really well for up to a week. Those Omega-3s are best kept cool, so don’t leave a big container sitting out on the counter all week long, please!
If you want to really stock up, freezing is your best friend. You can scoop out individual or even daily servings into small freezer bags and toss those right into the deep freeze. When you’re ready for a serving, just pull the bag out the night before and let it thaw in the fridge. It comes back to life perfectly, tasting just as fresh as it did the day it came off the baking sheet. This makes getting that boost of joint support super easy on busy mornings!
Serving Suggestions for Your Homemade Chicken and Spinach Joint Support Kibble
So, you’ve got this amazing, healthy, slightly golden-brown goodness sitting on your counter. Awesome! Now, how do you serve it up to your favorite canine companion? The beauty of dried homemade kibble is its versatility. It’s never just one-note food around here!
For a quick, easy weeknight feed, you can definitely serve this kibble straight up. If you’re using it as a complete meal replacement, just make sure you’re measuring out the portions correctly, basing it on your dog’s usual needs. If your dog is used to commercial food, maybe start by mixing this in slowly, perhaps swapping out just a quarter of their regular meal for this new, exciting mixture at first.
My favorite way to serve it, especially if I want Buster to lick the bowl clean, is to mix it with something wet just before serving. A little dollop of plain, unsweetened yogurt or even some warm water works wonders to soften it up a bit and release those amazing aromas from the turmeric and chicken. It turns a dry meal into something truly satisfying for them.

And because these pieces are sturdy but small, they make the BEST training treats. They pull apart easily if you need even smaller bits, and since they are loaded with healthy goodness rather than empty calories, you don’t feel guilty handing out five or six during a tough training session. If you’re looking for another fun recipe that combines chicken with fruits for energy, you should really look at my chicken and apple energy bowl!
Frequently Asked Questions About Homemade Chicken and Spinach Joint Support Kibble
It happens every time I share a new recipe—my inbox gets flooded with questions! That’s totally fine; I love that you care so much about what you’re feeding your pup. Baking homemade food always raises some good planning questions, especially when we are focusing on things like joint support ingredients. Let’s clear up a few things about this recipe so you can feel confident serving up your fresh batch of **Homemade Chicken and Spinach Joint Support Kibble**.
Is this Homemade Chicken and Spinach Joint Support Kibble nutritionally complete?
That’s a super important question, and honestly, it’s why I always say to check with your vet first! Because this recipe uses simple, cooked ingredients and is designed to be easy for everyone to whip up quickly, it isn’t professionally formulated to be a complete, balanced diet for every single dog life stage. Think of this as a wonderful, healthy boost—packed with protein and joint support goodness like flaxseed and turmeric—that you mix in with their regular diet, or use as a primary food source with vet approval.
We include all the right components, but for long-term, absolute nutritional completeness, consultation is always the safest bet. I always mention this on my About page; transparency is key when it comes to our dogs’ health!
How long does the Homemade Chicken and Spinach Joint Support Kibble last?
Because we bake this low and slow to dry it out, it lasts quite well, but remember, we aren’t using industrial preservatives! If you are making a standard batch, the best place for it is the refrigerator in a sealed, airtight container. It should stay fantastic for about one week. If you know you won’t get through it that fast, just portion it out into freezer bags before freezing.
I always keep one day’s worth in a small container on the counter, but the main bulk goes right into the deep freeze. Pulling a serving out the night before is totally simple, and it keeps your supply of healthy chicken kibble fresh for weeks!
Estimated Nutritional Snapshot for Homemade Chicken and Spinach Joint Support Kibble
I always love looking at the numbers after I’ve made a fresh batch, even though I know we are focusing on whole foods here! It’s smart to know exactly what you’re sending down the hatch, isn’t it? Now, remember, since we aren’t using commercial lab testing with guaranteed formulas, these figures are solid estimates based on the raw ingredients used in this **Homemade Chicken and Spinach Joint Support Kibble** recipe. This gives you a great ballpark idea of the fantastic nutrition packed into every serving!
The yield comes out to about 3 cups total, and we figure a standard serving size is just shy of a quarter cup. Here’s what the math looks like for that standard serving:
- Serving Size: 1/4 cup
- Calories: Approximately 180
- Protein: Around 15 grams (Great for muscle support!)
- Fat: About 7 grams (That’s where your healthy fish oil is boosting things!)
- Carbohydrates: Around 15 grams
- Fiber: About 2 grams
- Sodium: Roughly 50 mg
- Saturated Fat: Just 1 gram
- Cholesterol: Around 45 mg
You can see we keep the saturated fats nice and low, which is exactly what I want for active joints. It’s a great balance of lean protein and those good anti-inflammatory fats. It just proves that simple ingredients, mixed with love, make for truly great meals!
Share Your Success with This Joint Support Kibble
Alright, now that you have baked up your first batch of this amazing joint support food, I really want to hear about it! Seeing your dogs enjoy something you’ve made with so much care—that’s the best part of sharing these recipes with you all.
Did your dog sniff it suspiciously at first and then lick the entire bowl clean? Let me know! Drop a comment below, honestly! Tell me if you thought it was easy, if you had any trouble with the drying time, or if you noticed a little extra spring in your pup’s step after a few days of eating this. Your feedback helps everyone else who is thinking about trying out this **Homemade Chicken and Spinach Joint Support Kibble**.
And please, please, please—if you snapped a picture of Buster (or Cooper, or Daisy!) chowing down on this homemade goodness, share it on social media!
- Snap a photo of the finished kibble.
- Tag us so we can see your perfect little dried nuggets!
- Tell everyone how much your dog loves this healthy boost.
We love seeing these recipes come to life outside of my kitchen. If you run into any last-minute troubleshooting questions or just want to say hello, don’t hesitate to head over to the contact page. Happy baking, and here’s to many more happy walks!
Print
Homemade Chicken and Spinach Joint Support Kibble
- Total Time: 55 min
- Yield: About 3 cups 1x
- Diet: Low Fat
Description
A simple recipe for homemade dry dog food focusing on joint health ingredients.
Ingredients
- 1 cup cooked, shredded chicken breast
- 1 cup cooked brown rice
- 1/2 cup cooked spinach, finely chopped
- 1/4 cup ground flaxseed
- 2 tablespoons fish oil
- 1 tablespoon ground turmeric
- 1/2 cup water or low-sodium chicken broth
Instructions
- Preheat your oven to 300°F (150°C). Line a baking sheet with parchment paper.
- In a large bowl, combine the shredded chicken, cooked brown rice, chopped spinach, ground flaxseed, fish oil, and turmeric. Mix well.
- Add the water or broth slowly until the mixture holds together when pressed, but is not overly wet.
- Spread the mixture thinly and evenly onto the prepared baking sheet. Aim for about 1/4 inch thickness.
- Bake for 30 to 40 minutes, or until the mixture is dry to the touch.
- Remove from the oven and let it cool completely on the sheet.
- Once cool, break the mixture into small, kibble-sized pieces using your hands or a knife.
- Store the finished kibble in an airtight container in the refrigerator for up to one week or freeze for longer storage.
Notes
- Adjust the amount of liquid based on the dryness of your cooked ingredients.
- You can substitute brown rice with cooked quinoa for a different grain base.
- Consult your veterinarian before making significant changes to your dog’s diet.
- Prep Time: 15 min
- Cook Time: 40 min
- Category: Pet Food
- Method: Baking
- Cuisine: General
Nutrition
- Serving Size: 1/4 cup
- Calories: 180
- Sugar: 1
- Sodium: 50
- Fat: 7
- Saturated Fat: 1
- Unsaturated Fat: 6
- Trans Fat: 0
- Carbohydrates: 15
- Fiber: 2
- Protein: 15
- Cholesterol: 45
Keywords: dog food, homemade kibble, chicken, spinach, joint support, flaxseed, turmeric