
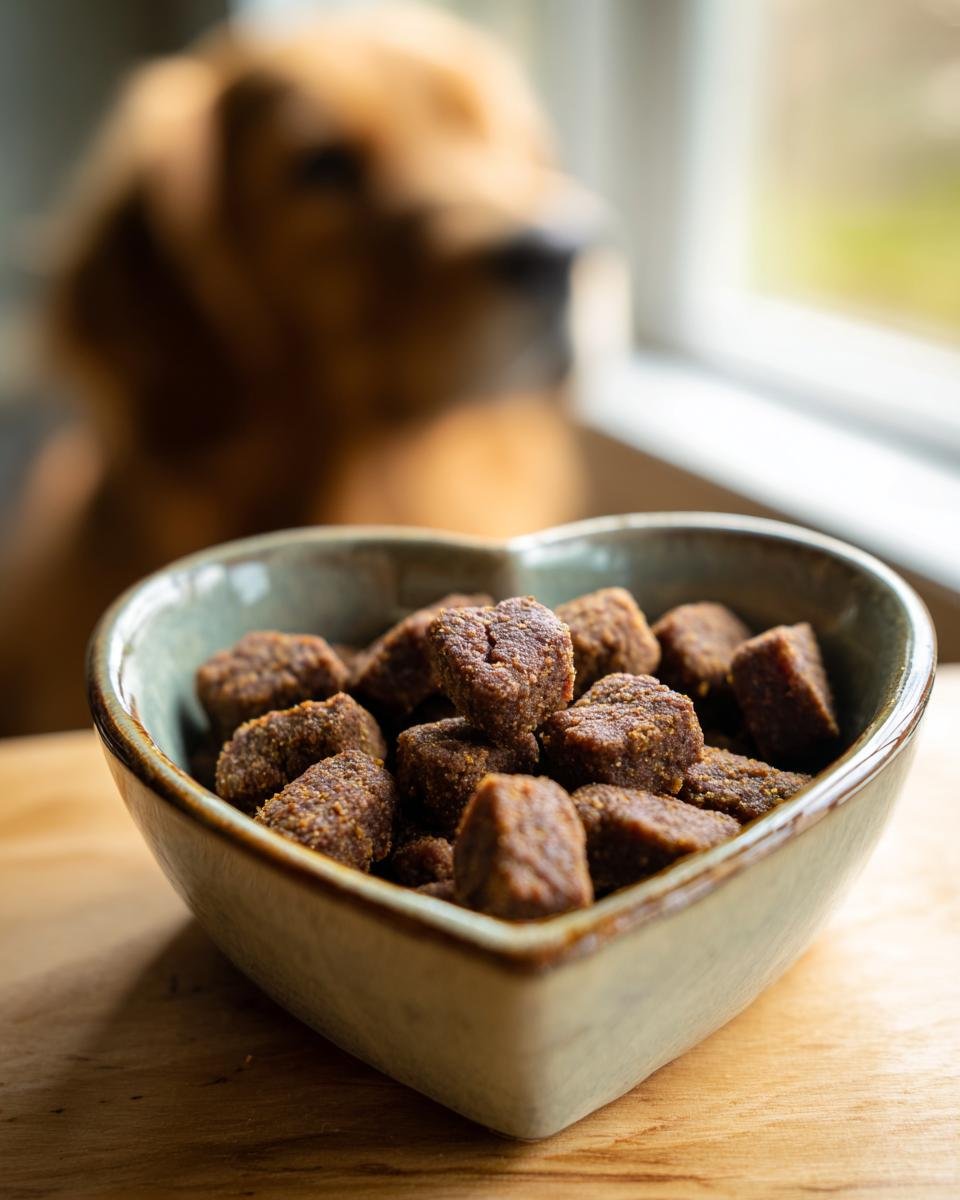
Oh, you guys, there is nothing quite like looking at your best friend’s delighted face when you hand them a snack you made with your own two hands! It just feels right, doesn’t it? I used to spend so much time guessing what was lurking in store-bought bags. That’s why I’m completely obsessed with sharing these Homemade Beef and Apple Iron Boost Kibble Bites with you today. They are simple, packed with good stuff, and they come together faster than you can chop veggies for your own dinner. Seriously, if you think making dog food is complicated, prepare to be amazed. These little bites are my go-to for training rewards because they’re sturdy and my crew absolutely devours them! We all want to do the best for them, and finding trustworthy resources helps so much, which is why I always recommend checking out what we share over at our info page when you’re starting out!
Why Make Homemade Beef and Apple Iron Boost Kibble Bites?
Listen, when it comes to our dogs, we want the absolute best, right? If you’re anything like me, you get a little twitchy looking at long ingredient labels filled with things you can’t even pronounce. Making your own treats means you are in total control. You know exactly what’s going into every single bite. It gives you such a great feeling of confidence, which is what E-E-A-T is all about—being trustworthy in your kitchen!
These Homemade Beef and Apple Iron Boost Kibble Bites aren’t just filler; they are packed with things that support good health. I love sneaking in functional goodness without making the process difficult. You can find other great ideas like our beef and carrot jerky right here when you’re ready for something new!
Ingredient Control and Quality Assurance
This is my number one reason for baking anything for the pups. Do you worry about preservatives or mystery meats? Me too! When you use 100% ground beef that you trust, you eliminate all that guesswork. You control the fat content, you control the binding agents, and you know exactly how fresh everything is. It’s peace of mind wrapped up in a little crunchy package!
The Iron Boost in Homemade Beef and Apple Iron Boost Kibble Bites
We all know dogs need iron for energy and healthy blood, and guess what’s an amazing natural source? Beef! These Homemade Beef and Apple Iron Boost Kibble Bites use real ground beef to give your dog a nice lift. Plus, the apples—they bring that little touch of sweetness that dogs adore, but they also offer fiber without tipping the scales on sugar. It’s a simple combination that tastes gourmet to a dog, but feels responsible to us!

Gathering Ingredients for Homemade Beef and Apple Iron Boost Kibble Bites
Okay, let’s get down to business! Getting the right stuff is half the battle, and honestly, once you gather these few things, you’re practically done. You don’t need a huge pantry stocked with specialty flours or weird powders for these Homemade Beef and Apple Iron Boost Kibble Bites. Everything goes into one big bowl, which is my favorite kind of mixing.
Here’s exactly what you need to pull together a batch that will make your dog think you are a kitchen wizard:
- 1 lb ground beef (we use standard 80/20, cooked or raw—I prefer raw for mixing, see below!)
- 1 cup unsweetened applesauce (super important that it has *no* added sugar or spices!)
- 2 cups whole wheat flour (don’t skimp here, this is the structure!)
- 1 large egg (just a regular binder we all have lying around)
- 1 teaspoon dried parsley (for a little freshness and color)
Ingredient Notes and Substitutions
When we talk about quality assurance, these next two ingredients are where you need to pay attention. First, that applesauce? It MUST be just apples and water; anything else confuses their tummies, so check that label twice! Also, if your dog has a weird sensitivity to wheat, you can sometimes switch to oat flour, but honestly, whole wheat gives the best ‘kibble’ bite structure. I usually stick to the recipe precisely because I want those great bites my dogs love, just like in this beef and parsley jerky recipe.
Also, big tip: I always use raw ground beef here. When it mixes with the liquid ingredients, it incorporates much more smoothly than if you tried to crumble up cooked beef. It binds better, trust me!
Step-by-Step Instructions for Homemade Beef and Apple Iron Boost Kibble Bites
Now for the fun part! You’ve got your ingredients ready, the kitchen smells faintly of sweet apples mixed with raw meat—don’t worry, that fades! We are moving fast here, so make sure your oven is ready to go before you start mixing, because the dough comes together quicker than you think. We need that heat waiting for our Homemade Beef and Apple Iron Boost Kibble Bites!
- First thing’s first, fire up that oven to 350°F (175°C). Get those baking sheets lined with parchment paper now. This prevents sticking later, which is a lifesaver!
- Grab your biggest bowl. We’re going to toss in the ground beef, applesauce, flour, that single egg, and the parsley. Just start mixing it all up.
- Keep going until it stops looking like soup and starts looking like actual dough. It’ll be stiff! If your mixer needs a break, just use your hands to bring it all together into one firm ball.
- Once it’s a unified dough, dust a clean surface lightly with flour. Take that dough and roll that baby out evenly until it’s about 1/4 inch thick. If you roll it too thin, they’ll bake up like chips, and we want some satisfying chewiness!
- Use a tiny cutter, or honestly, just wiggle a butter knife to slice them into small, bite-sized squares or circles. Remember, these are for rewarding good behavior, so size them appropriately for your pup!
- Lay them out on your prepared sheets, leaving just a tiny bit of space between them—they don’t spread much, but we want even baking.
- Bake them for 20 to 25 minutes. The goal is firm and lightly browned, not dark brown!
- Pull them out and then you MUST let them cool completely on a wire rack. This is critical for texture! If you wrap them warm, they get soggy, and that spoils the crunch we worked so hard for. You can check out a similar recipe approach in my beef and apple crunch jerky recipe for comparison!
Mixing the Dough for Your Homemade Beef and Apple Iron Boost Kibble Bites
When you first combine everything, it looks messy. Don’t panic! You’re aiming for a true stiff dough. If you are using a stand mixer, use the dough hook attachment on low speed. If you’re tackling this by hand, as I often do, just use a sturdy spoon and then your clean hands. You really need to work it until that flour is fully incorporated and you can lift the dough without it being sticky grey muck. If it feels too crumbly, add just a teaspoon of water, but honestly, the egg usually keeps it together perfectly.
Cutting and Baking for Perfect Kibble Bites
Thickness is everything here. If you go thicker than 1/4 inch, they’ll stay soft in the middle, which isn’t the kibble texture we want for shelf stability. Use whatever little cutter you have—a small shot glass works in a pinch! When they come out of the oven, they should smell savory and baked through. Don’t rush the cooling process. That final hardening happens as they sit on the rack, turning them into perfect, portable Homemade Beef and Apple Iron Boost Kibble Bites.
Tips for Success When Preparing Homemade Beef and Apple Iron Boost Kibble Bites
Baking these treats is usually pretty smooth sailing, but I’ve learned a couple of things over the years that prevent any little kitchen headaches. First, let’s talk stickiness. If your dough feels slightly tacky when you roll it out, don’t just dump in more flour! That will dry out the whole batch, and we won’t get those satisfyingly firm Homemade Beef and Apple Iron Boost Kibble Bites. Instead, dust your rolling pin and your hands lightly with flour. A little oil on your hands can also help keep that beef mixture from clinging everywhere.
If your dog is a tiny Chihuahua, you need tiny bites, and if you have a giant Great Dane, they need something a bit more substantial. It’s simple, but adjusting the size means adjusting your baking time. Smaller bites might only need 18 minutes, while bigger ones could use the full 25 or even 30 minutes to get firm all the way through. Always check that they feel solid when you gently press them!
For guaranteed non-stick success—even though baking powder isn’t in this recipe—make sure you use that parchment paper I mentioned earlier! It’s cheap insurance against scorched bottoms. If you loved these tips, you should check out the safety notes in my beef and green bean power jerky guide; sometimes preventative steps work across different recipes!
Storage and Make-Ahead Options for Homemade Beef and Apple Iron Boost Kibble Bites
This is such a smart question because nobody wants to make tiny batches all the time! The best part about these Homemade Beef and Apple Iron Boost Kibble Bites is that they are designed to be made ahead. You put in the time once, and you have treats ready for weeks! But you absolutely have to follow my cooling rule before we even think about containers.
If you wrap them while they are even slightly warm, all that residual heat turns into steam inside the airtight container. Guess what that creates? Soggy, sad kibble bites, and we can’t have that! They need to go onto a wire rack until they are completely cool and dry to the touch—no warmth at all.
Once they are bone dry, storing them in the refrigerator is super easy. Pop them into any airtight container. I use big glass jars because they look nice on the counter, but any tight-sealing box works. In the fridge, these Homemade Beef and Apple Iron Boost Kibble Bites will last up to one full week. They stay firm and they smell fantastic when you open the jar!
Now, if you’re like me and you bake a huge batch because you can’t stop at just one recipe, you definitely need the freezer option! You can absolutely freeze these bites. Make sure they are perfectly cool, then portion them out—maybe into Ziploc bags with about a week’s worth of treats in each one. They freeze wonderfully and you don’t even need to worry about them sticking together if you spread them on a baking sheet to freeze for an hour first. Then, just toss the frozen chunks into your freezer bag and stash them away!
They thaw really fast, too. Just pull out what you need from the freezer the night before, or leave them on the counter for an hour while you’re getting ready for a walk. They’re ready to go! It saves me so much time during busy weeks, and knowing I have these nutritious little things ready is a huge win. For more ideas on making bulk beef treats, take a look at my beef and sweet potato blend—it freezes just as well!
Serving Suggestions for Homemade Beef and Apple Iron Boost Kibble Bites
So, you’ve got your batch cooling, and you’re just waiting for that last little bit of crunch to set in. Now comes the best part: figuring out how to spoil your pup rotten! These Homemade Beef and Apple Iron Boost Kibble Bites are way too good to just save for a single occasional treat. I use them for everything because they are sturdy, flavorful, and small enough that I don’t feel guilty handing out a bunch during a long training session.
Honestly, they shine brightest as training rewards. If you are working on recall or teaching a brand-new trick, you need something high-value that your dog will drop everything for. These beef and apple bites fit that bill perfectly! Because they are packed with real meat, my dogs snap them up instantly, making those short, quick reward bursts super effective. You can see how focused I keep my crew with tasty rewards like these in my guide on beef and blueberry training jerky recipes, too!
But don’t stop there! I also love crumbling a few of these Homemade Beef and Apple Iron Boost Kibble Bites right over their regular dinner bowl. Sometimes, my dogs go through a slump where they turn their noses up at their standard kibble. A little sprinkle of this savory, beefy goodness on top acts like the best textural and flavor topping imaginable. It’s a fantastic way to sneak in some extra flavor, especially if you’re adding medicine or a supplement they are grumpy about taking.
Since they are baked and fairly dry, they don’t leave a huge greasy mess on your hands, which is huge for me—I hate oily fingers! They are perfect for slipping into a pocket or a small pouch when you head out to the park. They hold their shape, they don’t crumble into dust, and the beef aroma is just enticing enough to keep your dog happily focused on you, rather than the squirrel in the tree!
Frequently Asked Questions About Homemade Dog Kibble
It’s smart to have a few questions before you start baking for your furry family! I’ve been asked the same things a million times, so let’s clear up any confusion about making your own dog treats. It’s so rewarding when you see how much your dog loves the simple, wholesome ingredients. If you’re looking to check out other simple recipes, our main treats category page has tons of ideas!
Can I substitute the ground beef in this recipe?
That’s a big “be careful” area for me. While you *could* substitute turkey or lean pork, you change the whole nutritional profile, especially the iron boost we were aiming for. If you absolutely must swap the protein, make sure it’s a lean ground meat you trust completely. Remember, you are feeding this to your best friend, so sticking to the beef ensures you get the intended benefits for your homemade kibble!
How long do these homemade kibble bites last if I do not freeze them?
Because these bites contain fresh meat and moisture from the applesauce, they don’t have the shelf life of store-bought dry kibble. If you make them and let them cool completely, store them in an airtight container in the refrigerator. You should aim to use them up within about one week for the best freshness and texture. Don’t leave them on the counter for days, that’s how they go bad!
Are these Homemade Beef and Apple Iron Boost Kibble Bites suitable for puppies?
They can be, but you have to be super mindful of the size! Puppies, especially the little ones, can choke easily on anything too large. If you’re serving these to a puppy, you absolutely must use a very small cutter—think dime-sized at most. Also, make sure they are baked extra firm so they don’t crumble unexpectedly. They are a great way to introduce new flavors, but think tiny rewards for tiny mouths!
Estimated Nutritional Data for Homemade Beef and Apple Iron Boost Kibble Bites
I always feel a little bit like a scientist when I break down the numbers, but since we’re making food for our dogs, knowing what’s in there is just smart planning! We covered how these Homemade Beef and Apple Iron Boost Kibble Bites are packed with iron from the beef, but it’s also good to see the overall picture of what five bites gives your pup. It’s reassuring, especially if you’re trying to balance their daily diet!
Here’s a quick overview based on standard ingredient sourcing for a serving size of 5 bites. Now, remember, the exact brand of flour or the leanness of the beef can shift these numbers around just a smidge, so think of this as your best estimate. For an even more comprehensive look at boosting nutrients, you might want to check out my guide on the beef and lentil iron boost bowl!
These numbers reflect the carefully balanced energy our little homemade kibble provides:
- Serving Size: 5 bites
- Calories: 120
- Protein: 8g
- Fat: 6g (with 2g being saturated)
- Carbohydrates: 12g (Fiber: 1g)
- Sugar: 3g
- Sodium: 45mg
See? It’s a great blend of protein and quality carbs to keep them energized for playtime! It’s why I trust making these Homemade Beef and Apple Iron Boost Kibble Bites for daily rewards instead of reaching for those super processed store brands. Knowing the exact sodium content alone makes this effort worthwhile!
Share Your Homemade Beef and Apple Iron Boost Kibble Bites Experience
Whew! That’s it—you’ve successfully whipped up a batch of the best, crunchiest, most iron-packed treats on the block. Seriously, take a minute to look at that tray of Homemade Beef and Apple Iron Boost Kibble Bites. Doesn’t that just feel like a massive win? I always feel like I deserve a treat myself after a successful baking session!
Now, here is the most important part: I want to know how it went! Did your dog approve? Mine usually lets out this little happy whine when they smell the beef baking, and I bet yours did too. I am always looking to hear what worked best for you, especially if you have a picky eater. Did they prefer them cut into squares or little circles?
Don’t be shy! Drop your star rating below. Seriously, those stars help other busy dog parents find this recipe, and I rely on your feedback to know if things are working perfectly in your kitchen. If you snapped a picture of your dog doing a happy dance for these Homemade Beef and Apple Iron Boost Kibble Bites, please share it! You can tag us or send it my way; I love collecting happy dog photos.
If you have any last-minute questions about storage, substitutions, or just want to share a victory, please use the contact form linked here! Happy baking, and give those furry best friends an extra scratch from me!
Print
Homemade Beef and Apple Iron Boost Kibble Bites
- Total Time: 45 min
- Yield: About 4 dozen bites 1x
- Diet: Vegetarian
Description
Simple recipe for homemade dog kibble bites featuring beef and apple for added iron.
Ingredients
- 1 lb ground beef
- 1 cup unsweetened applesauce
- 2 cups whole wheat flour
- 1 large egg
- 1 teaspoon dried parsley
Instructions
- Preheat your oven to 350°F (175°C). Line baking sheets with parchment paper.
- In a large bowl, combine the ground beef, applesauce, flour, egg, and parsley. Mix until a stiff dough forms.
- Roll the dough out on a lightly floured surface to about 1/4 inch thickness.
- Use a small cookie cutter or knife to cut the dough into small, bite-sized pieces.
- Place the pieces on the prepared baking sheets.
- Bake for 20-25 minutes, or until firm and lightly browned.
- Let the kibble bites cool completely before storing.
Notes
- Store cooled kibble bites in an airtight container in the refrigerator for up to one week.
- You can freeze these bites for longer storage; thaw before serving.
- Adjust the size of the bites based on your dog’s size.
- Prep Time: 20 min
- Cook Time: 25 min
- Category: Pet Food
- Method: Baking
- Cuisine: American
Nutrition
- Serving Size: 5 bites
- Calories: 120
- Sugar: 3
- Sodium: 45
- Fat: 6
- Saturated Fat: 2
- Unsaturated Fat: 4
- Trans Fat: 0
- Carbohydrates: 12
- Fiber: 1
- Protein: 8
- Cholesterol: 30
Keywords: dog food, homemade kibble, beef apple treats, iron boost, dog treats