
You know how sometimes you just want to spoil your pup but you don’t want to buy those big bags of stuff full of things you can’t pronounce? Me too! That’s why I got serious about baking for my own pack. I needed something quick that packed a real punch, and trust me, these Homemade Chicken and Apple Energizing Mini Kibbles are the answer. They take virtually no time to whip up, and seeing my dog zoom around afterward tells me I’m doing something right here. It’s all about simple goodness, and you can learn exactly how I make these little bites over on my About page.
Why You Must Make Homemade Chicken and Apple Energizing Mini Kibbles Today
Seriously, why wouldn’t you make these today? They check every box a good owner looks for. Forget spending ages measuring weird powders—this recipe is shockingly fast, and the payoff is huge. You’ll want to bookmark this recipe right now because these Homemade Chicken and Apple Energizing Mini Kibbles are total game-changers for snack time or training rewards.
- They provide a genuine energy boost thanks to the combination of lean chicken and natural fruit sugars from the apple. No weird commercial fillers here!
- Seriously, only five main ingredients! If you cook for your dog at all, you probably have everything needed right now.
- Portion control is a breeze when you make them this small. You know exactly what goes into every tiny bite.
- They bake up super fast—I mean, under 20 minutes! Perfect for that last-minute training session you forgot to prep for.
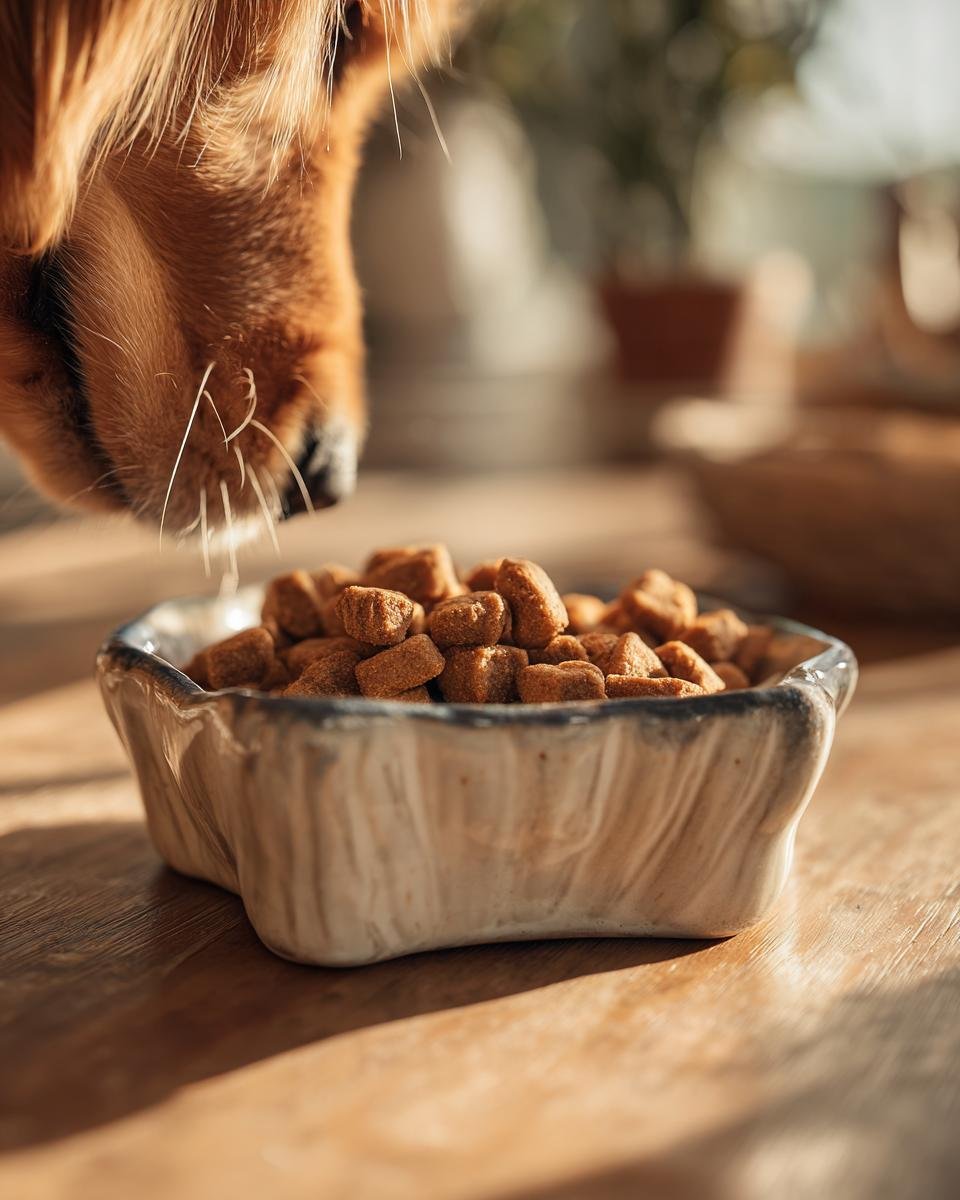
- The combination of chicken and apple is naturally delicious, so your dog will actually come running when you open the container.
- These are much lower in sodium and weird preservatives than anything you buy off the shelf. It’s just clean food!
If you like keeping the kitchen busy, I have a whole philosophy on pairing meals with snacks, which you can check out here if you want more ideas!
Gathering Ingredients for Your Homemade Chicken and Apple Energizing Mini Kibbles
Okay, ingredient gathering is the easiest part of this whole process, honestly. I’ve found that having everything measured out before you even turn the oven on makes mixing feel like flying. Since we are making these Homemade Chicken and Apple Energizing Mini Kibbles for energy, we need quality stuff, but nothing too complicated!
Here is what you need to pull together for about 30 little power-packed kibbles:
- Exactly 1 cup of cooked, ground chicken. Make sure it’s plain meat, no seasonings whatsoever!
- 1/2 cup of applesauce. This needs to be the pure stuff—unsweetened is key here.
- 1/4 cup of rolled oats. Don’t substitute with instant oats; the texture isn’t quite right.
- One large egg. This is our binder, so it has to be a good, solid egg.
- 1 tablespoon of coconut oil. You’ll need to melt this down before mixing, easy peasy.
That’s it! Five ingredients resulting in roughly 30 small kibbles. Pretty incredible, right?

Ingredient Substitutions for Homemade Chicken and Apple Energizing Mini Kibbles
While my heart belongs to this exact lineup, I know life happens, and pantries vary. You can definitely tweak things just a bit without messing up that energizing profile. I always tell people, if you have to swap something, make sure you know *why* you are swapping it!
First off, the chicken swap is super simple. If you’ve got some leftover shredded or ground turkey, using that instead of chicken is perfectly fine. Just make sure it’s cooked through and bland, just like the chicken.
For the applesauce, this is a big one: double-check the label! I cannot stress this enough—no added sugars or artificial sweeteners in that cup of applesauce. Our dogs don’t need that extra processed junk! If you can’t find pure unsweetened, you’re better off just grating half an apple fine instead.
Now for my expert tip here, building on that oat base: If you find that your dog is doing great on this recipe but maybe needs a bit more fiber, you can often substitute up to half of those rolled oats with finely ground flaxseed. Flaxseed is awesome for digestion, and since we’re only swapping half, the oats still provide wonderful structure for our Homemade Chicken and Apple Energizing Mini Kibbles. Just mix it in really well!
Step-by-Step Instructions for Perfect Homemade Chicken and Apple Energizing Mini Kibbles
Alright, let’s get baking! This part is so straightforward, I promise you’ll wonder why you didn’t start making homemade chicken and apple energizing mini kibbles sooner. First things first, we need heat!
- Get your oven set to 350°F (175°C) right away. Line a baking sheet with parchment paper—this prevents any sticking tragedies, which nobody needs.
- In a good-sized mixing bowl, toss in your cooked, ground chicken, that unsweetened applesauce, your rolled oats, the egg, and the melted coconut oil.
- Now, mix, mix, mix! You want to work this until everything is fully incorporated. It’ll look a bit sticky, which is exactly what we want.
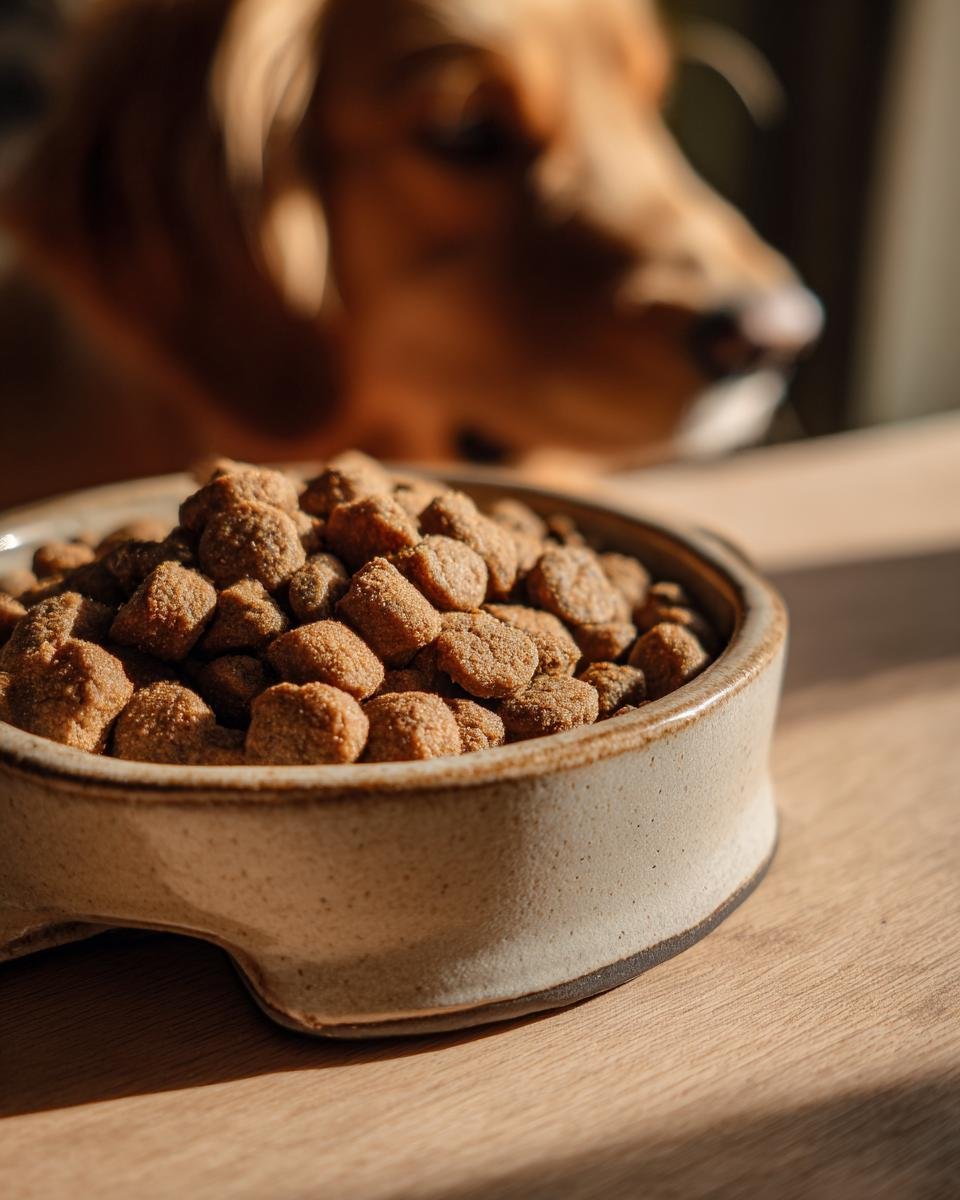
- Time to roll! Use a little spoon or your hands to form little balls, aiming for about a half-inch wide. Don’t make them perfect spheres; flatten them just slightly so they look like tiny, rustic kibbles.
- Lay those little guys out on the parchment-lined sheet. They can be a tiny bit close, but not touching.
- Pop them into the waiting oven for 15 to 18 minutes. Keep an eye on them!
This recipe is so fast, it fits perfectly into a busy afternoon. Once they look nice and are lightly browned, we move onto the most crucial part for texture, which I’ve detailed below, because drying them out properly is what separates a soft snack from real kibble!
Baking and Drying Tips for Homemade Chicken and Apple Energizing Mini Kibbles
Listen, those 15 to 18 minutes get the chicken and apple mix cooked through, right? But if you just pull them out and let them cool on the counter, they’ll be soft, maybe even crumbly. For actual kibble texture—that satisfying crunch—we need to dry them out more. This is where the magic happens, and it’s my little secret to making these treats last!
Once the time is up, turn the oven OFF. Don’t even think about opening the door yet! Leave the kibbles inside, but prop the oven door slightly ajar—just enough to let the steam escape slowly. Let them hang out in that residual heat for a solid 30 minutes. This slow drying process is what removes just enough internal moisture to firm them up nicely.
If you happen to have an older dog or know your pup prefers something really hard and snappy, you can bake them for an extra 5 minutes before starting the drying phase. Trust me, that little window between 15 minutes and 23 minutes makes all the difference to the final crunch!
Essential Equipment for Making Homemade Chicken and Apple Energizing Mini Kibbles
You don’t need a commercial bakery setup to make these delicious little Homemade Chicken and Apple Energizing Mini Kibbles, thank goodness! I have a tiny kitchen, so I rely on simple, standard tools that everyone probably already has hiding in their cabinets. Preparation is key, and having everything ready means the actual mixing goes super smooth.
Here’s what you’ll need pulled out before you even start melting your coconut oil, just to keep things flowing nicely:
- Your oven, obviously. We need that consistent 350°F (175°C) heat source.
- A good baking sheet. Make sure it’s one you trust not to warp too much in the heat.
- Parchment paper. Do not skip this! It saves you scrubbing later, and we want clean hands for rolling the kibbles.
- A decent-sized mixing bowl. You need enough room to stir the chicken, oats, and wet ingredients together without spilling everything onto your counter.
- Something to roll them with—a small scoop or maybe even just a teaspoon to measure consistency, though your hands work great, too, if you don’t mind getting a little sticky!
Honestly, that’s the whole toolkit. It’s so refreshing when a genuinely healthy recipe doesn’t require specialized gadgets, right? We’re focusing on the flavor here!
Tips for Success When Preparing Homemade Chicken and Apple Energizing Mini Kibbles
Even though this recipe for Homemade Chicken and Apple Energizing Mini Kibbles is super basic, those little details can take them from “good” to “the best treat ever.” Since we’re aiming for that authoritative homemade quality, I want to share a few things I learned through trial and error when I was perfecting the size and texture for my own dog.
Here are my must-dos to make sure every batch comes out perfectly firm and uniform:
Uniform Sizing is Non-Negotiable
You want every kibble to cook at the exact same rate, right? If you have some that are fat slugs and others that are tiny wafers, the wafers will burn while the slugs are still raw in the middle. I actually use a very small cookie scoop—the tiny one used for mini-muffins or melon balls—to measure out my dough before rolling. If you don’t have one, just eyeball it, but try to make them all the size of a small marble before you flatten them. Consistency equals success here.
Mastering the 1/2 Inch Flatten
When you flatten them, don’t squish them wafer-thin! Remember, they are supposed to be “mini kibbles,” not crackers. We are aiming for a thickness of about half an inch. Press down just enough with the back of a spoon until that sticky ball spreads out a little. If your mixture is too sticky to handle (sometimes applesauce consistency varies!), chill the whole bowl in the fridge for about 10 minutes first. That firms up the fat and makes rolling so much easier.
Testing for True Firmness
During baking, you need to go beyond just looking for brown edges. When you think they are close, take one out carefully (use tongs!) and let it cool for just 30 seconds. If you can press a finger into the middle of that single kibble and it springs back immediately, it’s done with the baking phase. If your finger leaves a deep dent, give the whole tray another 3 minutes in the oven before testing again.
These little steps make all the difference between a batch you toss and a batch you proudly store for training all week. If you ever have questions about substitutions or need help troubleshooting, feel free to reach out through my contact form—I love hearing from fellow home cooks!
Storage and Shelf Life of Your Homemade Chicken and Apple Energizing Mini Kibbles
Now that you’ve spent all that time perfecting the bake and that crucial drying phase, you definitely want to store your Homemade Chicken and Apple Energizing Mini Kibbles correctly so your dog can enjoy them all week long. Since these are packed with fresh, whole ingredients like chicken and apple, they don’t have the preservatives that commercial stuff does, which means we treat them a bit more carefully.
The absolute best way to keep these little treats fresh and firm is refrigeration. You need to store any remaining kibbles in a truly airtight container. I’m talking the kind with the rubber seal—not just a zip-top bag where air can sneak in around the edges. Keep that container tucked away in the refrigerator.
If you follow the drying process I detailed earlier (the 30 minutes in the slightly ajar oven), these should stay perfect and safe to serve for up to one week. It’s a good timeframe; they usually don’t last that long around my house anyway because the dogs gobble them up!
Because we’re keeping them cool and sealed tight, they maintain much better texture than if you left them on the counter. Room temperature storage is fine for maybe a day or two if you’re using them immediately, but if you want that firm, energy-boosting crunch for the whole week, the fridge is your friend.
How do you check if they’ve gone bad? It’s simple, really, and relies on your senses, which is key for any homemade food. First, check the smell. If they smell sour or off—anything other than pleasant baked chicken and apple—toss them immediately. Second, check the texture. If you notice any dampness, sliminess, or mold forming (usually green or white spots), they’ve absorbed too much moisture and are no longer safe to serve. Since they are low-fat, they usually hold up well, but trust your nose and eyes!
If you ever want to look over my site’s data security standards while you’re popping these away, you can check out the privacy policy. Happy storing!
Variations on Homemade Chicken and Apple Energizing Mini Kibbles
The basic formula for these Homemade Chicken and Apple Energizing Mini Kibbles is fantastic and reliable, but sometimes your pup needs a fun change-up, or maybe you run out of oats just when you are ready to mix! I love experimenting safely, making sure whatever I add still supports that energizing purpose.
When you’re making treats for your best friend, safety is always step one, right? But once you know the base is solid—chicken, binder, and fruit—you can start playing around a little bit with flavor additions. Here are a couple of my favorite, totally safe ways to switch things up in your mixing bowl!
A Touch of Warmth
If your dog doesn’t have any known sensitivities, adding just a tiny pinch of cinnamon to the mix is wonderful. It pairs amazingly well with apple, boosting that sweet flavor profile without adding any sugar. I mean just a *pinch*—like, less than 1/8 of a teaspoon for the whole batch. It makes the whole kitchen smell fantastic while they bake!
Grain Swaps for Variety
If you wanted to swap out the rolled oats, I’ve had good success with other dog-safe grains. Quinoa works really well if you cook it plain first and let it cool completely, though you might need just a touch more liquid since cooked quinoa is drier than rolled oats. Another option is using plain, unsalted puffed rice cereal, crushed up a bit. This lightens the texture nicely, making them even airier, and you can find that over in my regular meal recipes section for comparison!
The Turkey Swap Reminder
I mentioned this before in the ingredients section, but it’s worth repeating here: cooked, ground turkey is a perfect stand-in for the chicken. It keeps the lean protein high and the fat low, which is excellent for sustained energy. Just make sure whatever meat you use is completely plain. No garlic powder, no onion powder—those are big no-nos for dogs!
These variations keep the snack exciting for my dogs. It’s not just about feeding them; it’s about making sure snack time is always a fun, delicious experience for them!
Frequently Asked Questions About Homemade Chicken and Apple Energizing Mini Kibbles
I totally get it; when you’re making something special like these Homemade Chicken and Apple Energizing Mini Kibbles, questions pop up! It’s much better to ask now than to guess while you’re mixing or baking. I’ve gathered up the ones people ask me most often in the comments and emails. Hopefully, these clear things up so you can get back to baking!
Can I freeze these kibbles?
Oh, that’s a great question! If you want to make a huge batch to save time later, freezing is definitely an option. They store beautifully in the fridge for a week, but for long-term storage, pop those cooled, dried kibbles into a freezer-safe bag or container. Make sure you get as much air out as possible, and they should stay good in the freezer for up to two—maybe even three—months! Thaw them out overnight in the fridge rather than on the counter to keep that nice firm texture we worked so hard for.
Are these energizing mini kibbles suitable for puppies?
That’s something you really have to check with your vet, but generally speaking, yes, they are great because of the simple ingredients! Puppies need really balanced nutrition as they grow. Since these Homemade Chicken and Apple Energizing Mini Kibbles are packed with lean protein from the chicken, they’re a good energy source. The main thing to watch for is the size of the kibble itself. If your puppy is tiny, you might want to roll them even smaller than the half-inch I suggested, or maybe even mash them slightly more before baking so they are easier to chew, just to be safe!
What if my dog prefers softer treats?
If your dog isn’t a fan of that hard, crunchy kibble texture, no problem at all! The key here is that drying step. To keep them softer—more like a chewy meatball than actual kibble—just skip the step of turning the oven off and leaving them inside to dry for 30 minutes. Pull them immediately out of the oven after baking for 15 to 18 minutes. They will still be firm enough to handle since the egg and coconut oil help bind everything, but they’ll retain much more moisture. You’ll just need to store those softer versions in the fridge, too, and use them up within 4 or 5 days max.
Can I use another fruit besides apple in these energy bites?
Apples work perfectly because they are low in sugar and super firm, which helps the overall structure of the mix. If you want to swap, cooked, mashed banana is a popular choice, but be careful! Banana adds a lot more moisture and natural sugar, so you might need to add an extra tablespoon of rolled oats to compensate and keep the mix from getting too sloppy. I haven’t tested other berries yet, but if you try one, be sure to tell me how it goes over on my recipe page!
Estimated Nutritional Snapshot for Homemade Chicken and Apple Energizing Mini Kibbles
I always feel better knowing exactly what my furry friend is consuming, even in a small snack like our Homemade Chicken and Apple Energizing Mini Kibbles. Since these are made from simple, recognizable ingredients, it’s easy to calculate what’s going into each bite. This gives you fantastic control over their daily intake!
Here is a general breakdown based on the standard measurements for a serving size of about five of these little powerhouses.

- Calories: Around 65 per serving size (5 kibbles). Great for an energy boost without a ton of heavy calories!
- Protein: About 5 grams. That lean chicken is doing some heavy lifting here.
- Carbohydrates: We are looking at about 5 grams, mostly coming from those healthy rolled oats and the apple.
- Total Fat: Roughly 3 grams per serving. This is kept low intentionally because we use coconut oil measured carefully.
We’ve kept the sodium and sugars low too, which is always the goal when cooking whole foods for the dogs. You’ll see just 1 gram of sugar and 25mg of sodium listed.
Now, here’s the important part—the trust factor! Since every piece of chicken is different, and the exact size of your egg can vary, this is just an estimate, you know? I always like to remind people that exact nutritional values can shift based on the specific brand of applesauce you use or even the size of the chicken breast you start with. This snapshot is based on average nutritional sourcing, so consider it a very reliable guideline, but not a lab-tested guarantee for every single batch you make!
Print
Homemade Chicken and Apple Mini Kibbles
- Total Time: 33 min
- Yield: About 30 small kibbles 1x
- Diet: Low Fat
Description
Small, nutritious kibbles made with chicken and apple for your dog.
Ingredients
- 1 cup cooked, ground chicken
- 1/2 cup unsweetened applesauce
- 1/4 cup rolled oats
- 1 large egg
- 1 tablespoon coconut oil, melted
Instructions
- Preheat your oven to 350°F (175°C). Line a baking sheet with parchment paper.
- In a medium bowl, combine the ground chicken, applesauce, rolled oats, egg, and melted coconut oil. Mix until fully incorporated.
- Roll the mixture into small balls, about 1/2 inch in diameter. Flatten each ball slightly to form a small kibble shape.
- Place the kibbles on the prepared baking sheet.
- Bake for 15 to 18 minutes, or until firm and lightly browned.
- Turn off the oven and let the kibbles cool completely inside the oven with the door slightly ajar for about 30 minutes to dry them out.
- Store cooled kibbles in an airtight container in the refrigerator for up to one week.
Notes
- You can substitute cooked turkey for chicken if desired.
- Make sure the applesauce contains no added sugar or sweeteners.
- For a crunchier kibble, bake for an additional 5 minutes.
- Prep Time: 15 min
- Cook Time: 18 min
- Category: Pet Food
- Method: Baking
- Cuisine: American
Nutrition
- Serving Size: 5 kibbles
- Calories: 65
- Sugar: 1
- Sodium: 25
- Fat: 3
- Saturated Fat: 1.5
- Unsaturated Fat: 1.5
- Trans Fat: 0
- Carbohydrates: 5
- Fiber: 0.5
- Protein: 5
- Cholesterol: 20
Keywords: dog food, homemade kibble, chicken, apple, healthy dog treats