
Listen, when you start making your own dog food, you unlock a whole new level of peace of mind. I got so tired of reading labels packed with fillers my little guy couldn’t handle. That’s why I developed this recipe for Homemade Beef and Pear Gentle Digest Kibbles. It’s wonderfully simple, requiring barely any special equipment! The beef gives them that amazing protein boost, but the real star is the pear—it keeps everything moving gently through their system. I started making these because Buster would just get so gassy on commercial stuff, and honestly, these kibbles changed everything for us overnight. You’re going to love how easy this is!
Why This Homemade Beef and Pear Gentle Digest Kibbles Recipe Stands Out
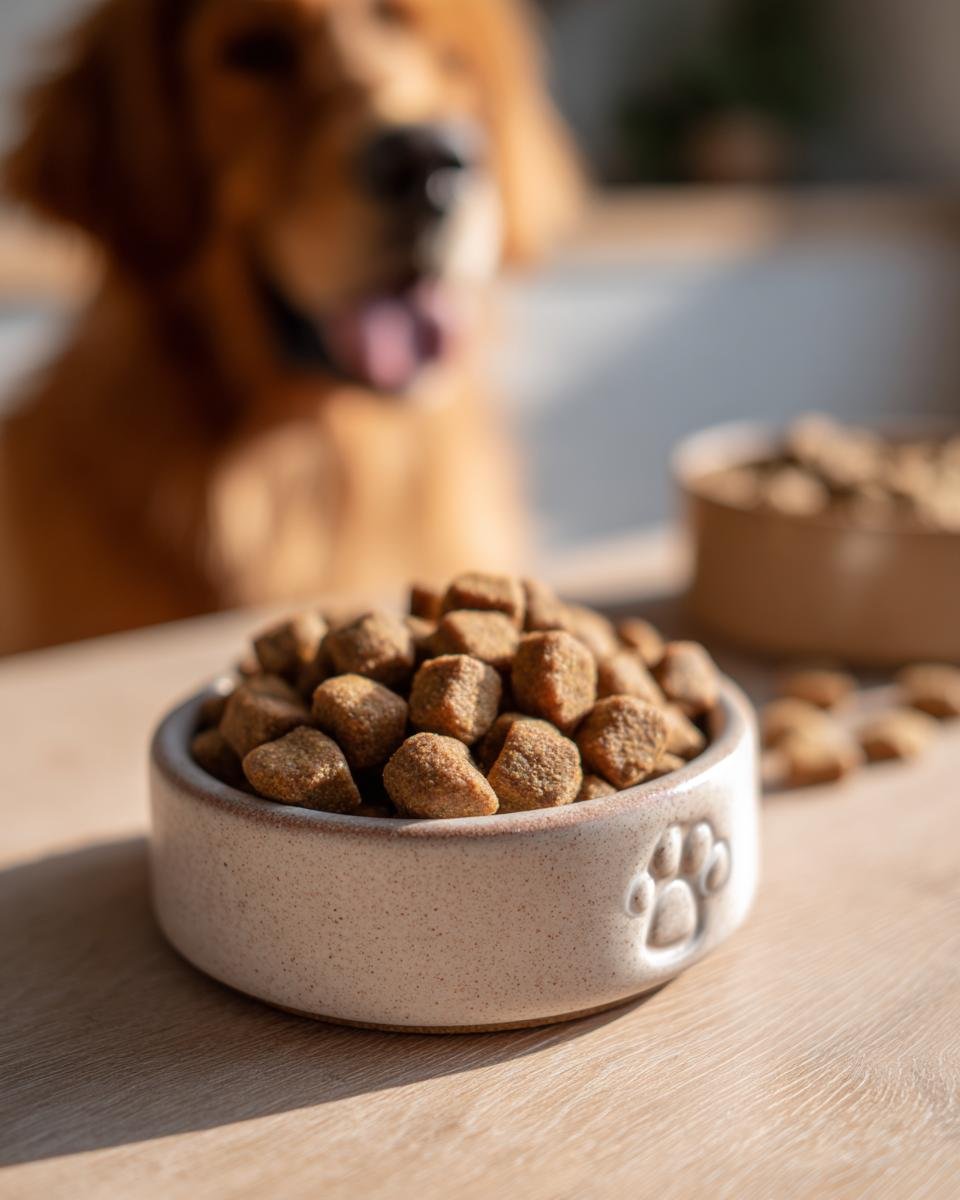
I promise you, once you see the quality ingredients going into these, you won’t look back at the big bags of store-bought food. This recipe for Homemade Beef and Pear Gentle Digest Kibbles is designed for maximum digestibility while still tasting incredible—at least according to my enthusiastic taste-tester, Buster!

It really separates itself from other recipes because it doesn’t call for complicated steaming or dehydrating machines. Pop it in the oven and you’re done! If you’re looking for an easy entry point into preparing gentle digestion dog food at home, this is it. Seriously, you can even swap the pear for unseasoned canned pumpkin if you have some leftover from a pie, though the pear is my favorite.
Key Benefits of Homemade Beef and Pear Gentle Digest Kibbles
- The simplest ingredient list you’ll find for a complete kibble—no weird powders or stabilizers here!
- Digestive support built right in thanks to the ripe pear, which is easy on sensitive tummies.
- Great source of high-quality protein from the 100% ground beef we use.
- They bake up firm and hold their shape perfectly, making them excellent for training rewards. If you want another simple digestive option, you should definitely check out my chicken and pumpkin digestive jerky, too!
Gathering Ingredients for Homemade Beef and Pear Gentle Digest Kibbles
Okay, this is where we build the sturdy foundation for our kibble. When you are making food for your best friend, you absolutely have to be precise about the ingredients—it’s how we make sure this Homemade Beef and Pear Gentle Digest Kibbles recipe actually helps digestion!
Don’t try to sneak in shortcuts here, especially with the pear. The success of the dough completely relies on everything being perfectly mixed together. If you want to see another recipe built around simple, single-source ingredients, you might like my turkey and oat digestive jerky.
Essential Components for Gentle Digest Kibble
You’ll need five things, that’s it! Measure everything out before you start mixing, trust me, it keeps things moving faster once you get going.
- We need exactly 1 lb ground beef. No mixing cuts or leaving it too lean, we need that standard fat content for binding!
- Measure out 2 cups whole wheat flour. This gives us the structure we need to make real kibble shapes.
- The secret weapon is the fruit! You must have 1 large ripe pear, peeled and finely grated. And I mean *finely* grated; chunky pears won’t incorporate properly.
- You’ll need about 1/2 cup water handy, but we might adjust that slightly during mixing.
- One single egg to bring the whole dough together.
Step-by-Step Instructions for Making Homemade Beef and Pear Gentle Digest Kibbles
Now for the fun part—turning that messy bowl of ingredients into actual kibble! Following these baking and cooling instructions precisely is how we guarantee these Homemade Beef and Pear Gentle Digest Kibbles are both safe and perfectly crisp for storage. It’s surprisingly quick, which is exactly what I love about this recipe.
If you’re looking for another fast assembly option, my turkey and rice gentle jerky is another winner for quick prep time.
Mixing and Shaping Your Homemade Beef and Pear Gentle Digest Kibbles
First things first, we need heat! Preheat your oven to 350°F (175°C). Don’t forget to line those baking sheets with parchment paper—this is non-negotiable if you want easy cleanup!
In one big bowl, dump in all your ingredients: the ground beef, the whole wheat flour, that finely grated pear, the water, and the egg. Now, roll up your sleeves! You need to mix this until it becomes a really stiff dough. Don’t panic if it seems stiff; that’s what we want for proper kibble structure. Once you have that stiff mass, dust your counter lightly with flour and roll that dough out until it’s about 1/4 inch thick. Use a tiny cookie cutter—or honestly, just a butter knife works—to cut out small, uniform shapes. Place them neatly on your prepared sheets.
Baking and Cooling for Optimal Crispness
Time to bake! Pop those trays into the oven for about 20 to 25 minutes. You’re looking for them to be firm to the touch and just lightly browned around the edges. They shouldn’t look raw inside, but we aren’t looking for dark edges either!
Here is the absolute secret to shelf stability and the best crunch: once the timer goes off, turn off the oven completely. Leave the kibbles inside to cool down with the oven door propped slightly ajar. This slow cooling process pulls out exactly the right amount of moisture, making them super crisp. Once they are totally cool, transfer your batch right into an airtight container. Easy peasy!
Expert Tips for Perfect Homemade Beef and Pear Gentle Digest Kibbles
Making sure your kibble is perfect every single time takes just a tiny bit of intuition, but these tips really help you nail the texture and storage. When you’re making Homemade Beef and Pear Gentle Digest Kibbles, the dough consistency is the first place things can go sideways, but it’s so easy to fix!
If your dough feels crumbly and won’t come together into a ball—which happens if your pear was a little less juicy than expected—just add water, one teaspoon at a time. Mix it in really well before deciding you need more. Conversely, if it feels gummy or sticky, add just a sprinkle more whole wheat flour until it firms up.
Adjusting Consistency and Storage for Homemade Beef and Pear Gentle Digest Kibbles
Remember, we want these dried out nicely for storage, but the initial bake is just the first step. If you want these specific Homemade Beef and Pear Gentle Digest Kibbles to last longer than a week or two in the pantry, you need to commit to a second, low-and-slow drying phase.
After they’ve cooled completely from the initial bake, pop them back into a very low oven—around 200°F (95°C)—for about an hour. This extra time at a low temperature pulls out just enough extra moisture to make them rock hard, which is exactly what you want for long-term storage. If you enjoy this style of low-and-slow cooking for treats, you absolutely must try my recipe for lamb and oatmeal gentle sticks; it uses a similar patience method!
Serving Suggestions for Your Homemade Kibble
So you’ve got a whole batch of fresh, delicious homemade kibble! What now? I usually don’t serve these by themselves as the *entire* meal, mainly because I like to mix things up for Buster, but they are fantastic components for a well-rounded bowl.

The simplest way is to use them as a topper mixed with a little bit of their regular wet food—it adds great crunch and keeps the bill down! They are also perfect for training days. Because they are made of solid beef and pear, they are high-value rewards. If you need something slightly different for long training sessions, check out my beef and blueberry training jerky, which is a bit softer for quick chews!
You can also just use them as an evening crunchy snack before bed. Always a hit!
Storage and Shelf Life of Homemade Beef and Pear Gentle Digest Kibbles
Storing these homemade goodies correctly is just as important as baking them right! Once you’ve gone through that crucial cool-down phase—remember, oven off, door ajar—your Homemade Beef and Pear Gentle Digest Kibbles should feel completely dry and cool to the touch.
If they aren’t 100% dry, they risk molding quickly, so don’t rush that cooling step! You must store them in a completely airtight container at room temperature. If you baked them well and made sure they were crisp, they should last you a good couple of weeks this way without any issue. If you’re baking a huge batch, definitely use the freezer for anything you won’t use in three weeks. You can pop them straight from the freezer into the bowl; no need to thaw first! For another great shelf-stable option, I always keep a batch of my rabbit and sweet potato gentle jerky on hand, too.
Frequently Asked Questions About Gentle Digest Dog Food
I always get so many questions when people first try making their own homemade dog food! It’s great that you’re being so thoughtful about what goes into your pup’s bowl. Here are a few things I hear constantly when folks are whipping up their batch of Homemade Beef and Pear Gentle Digest Kibbles.
Can I substitute the whole wheat flour in Homemade Beef and Pear Gentle Digest Kibbles?
Yes, you absolutely can! Whole wheat is what I use because it binds really well with the ground beef and pear, but if your dog is sensitive to wheat, don’t sweat it. I know some folks have success swapping it 1:1 for oat flour or brown rice flour. Just be aware that changing the grain base *will* change the dough texture a bit. You might need to play around with that 1/2 cup of water just to get a stiff consistency again. Don’t worry, that’s part of the fun of custom gentle digestion dog food!
How long do Homemade Beef and Pear Gentle Digest Kibbles last?
This whole deal hinges on how crispy you get them during that cool-down! If you followed the instructions and made sure they were completely dry after baking and cooling, they should stay perfectly fine in a sealed, airtight container at room temperature for about 2 to 3 weeks. If you baked a double batch like I usually do, just pop half of them in a freezer-safe bag. They last easily three months in the freezer, and you can feed them straight out of there. For any other solid treat recipes, I always try to stick to that 2-week pantry rule, but freezing is your best friend for bulk batches!
If you want more recipes that focus on gentle chewing, you should definitely look at my beef and carrot lean jerky—it’s fantastic for older dogs!
Estimated Nutritional Profile for Homemade Beef and Pear Gentle Digest Kibbles
I always track this stuff because, even though Buster trusts me implicitly, I need to know what’s in his bowl! This part can be tricky because homemade food is always an estimate—you never truly know the exact nutrient breakdown based on the pear you picked up that day, right?
But based on the standard measurements for this batch of Homemade Beef and Pear Gentle Digest Kibbles, here is what the math works out to for a single serving size (which is about 1/4 cup). Take these numbers as a terrific guideline for what you’re feeding, but remember they are just estimates!
It’s amazing how much protein we pack in here while keeping things balanced for easy digestion.
- Serving Size: 1/4 cup
- Calories: 180
- Protein: 10g
- Fat: 8g (A good amount of which is crucial for energy!)
- Carbohydrates: 18g
- Sodium: 60mg
- Fiber: 2g (That little bit from the pear really helps!)
Just a heads-up, since this recipe uses ground beef, the fat content is essential for binding the kibble structure, but we balance that out with the natural sugars and fiber from the pear. These figures are based on the entire yield of the recipe divided by the approximate number of servings. If you dry them out further for longer shelf life, the calorie density per cup will increase slightly because you’ve removed more water!
Share Your Homemade Beef and Pear Gentle Digest Kibbles Creations
Honestly, the best part of sharing these recipes is seeing your happy pups gobble them down! I’ve poured so much love into figuring out the perfect formula for Homemade Beef and Pear Gentle Digest Kibbles, and knowing it helps another sensitive tummy makes all the early morning testing worth it.
So, once you’ve rolled, cut, and baked your first batch, I absolutely want to hear about it! Did your dog come running the second they smelled the beef baking? Do these kibbles work perfectly as your go-to training treat?
Please leave a rating right here on the recipe page—five stars if Buster would approve! If you snap a picture of your dog happily crunching on their new favorite snack, please tag me on social media! It always brightens my day to see my recipes in real kitchens.
And if you ever have a question or a substitution you tried that was a huge success, don’t hesitate to drop a comment below or reach out to me directly through the contact page. Happy baking!
Print
Homemade Beef and Pear Gentle Digest Kibbles
- Total Time: 45 min
- Yield: Approximately 4 cups 1x
- Diet: Vegetarian
Description
Simple, homemade dog kibble recipe featuring beef and pear for easy digestion.
Ingredients
- 1 lb ground beef
- 2 cups whole wheat flour
- 1 large ripe pear, peeled and finely grated
- 1/2 cup water
- 1 egg
Instructions
- Preheat your oven to 350°F (175°C). Line baking sheets with parchment paper.
- In a large bowl, combine the ground beef, whole wheat flour, grated pear, water, and egg. Mix until a stiff dough forms.
- On a lightly floured surface, roll the dough out to about 1/4 inch thickness.
- Use a small cookie cutter or knife to cut the dough into small, uniform kibble shapes.
- Place the pieces on the prepared baking sheets.
- Bake for 20 to 25 minutes, or until the kibbles are firm and lightly browned.
- Turn off the oven and let the kibbles cool completely inside the oven with the door slightly ajar for extra crispness.
- Store cooled kibbles in an airtight container.
Notes
- You can adjust the water slightly if the dough is too dry or too wet.
- Ensure the pear is finely grated so it mixes evenly into the dough.
- For longer storage, you can dehydrate the kibbles further at a very low oven temperature (around 200°F or 95°C) for an additional hour after initial baking.
- Prep Time: 20 min
- Cook Time: 25 min
- Category: Pet Food
- Method: Baking
- Cuisine: General
Nutrition
- Serving Size: 1/4 cup
- Calories: 180
- Sugar: 4
- Sodium: 60
- Fat: 8
- Saturated Fat: 3
- Unsaturated Fat: 5
- Trans Fat: 0
- Carbohydrates: 18
- Fiber: 2
- Protein: 10
- Cholesterol: 45
Keywords: homemade dog food, beef and pear kibble, gentle digestion dog food, easy dog treats