
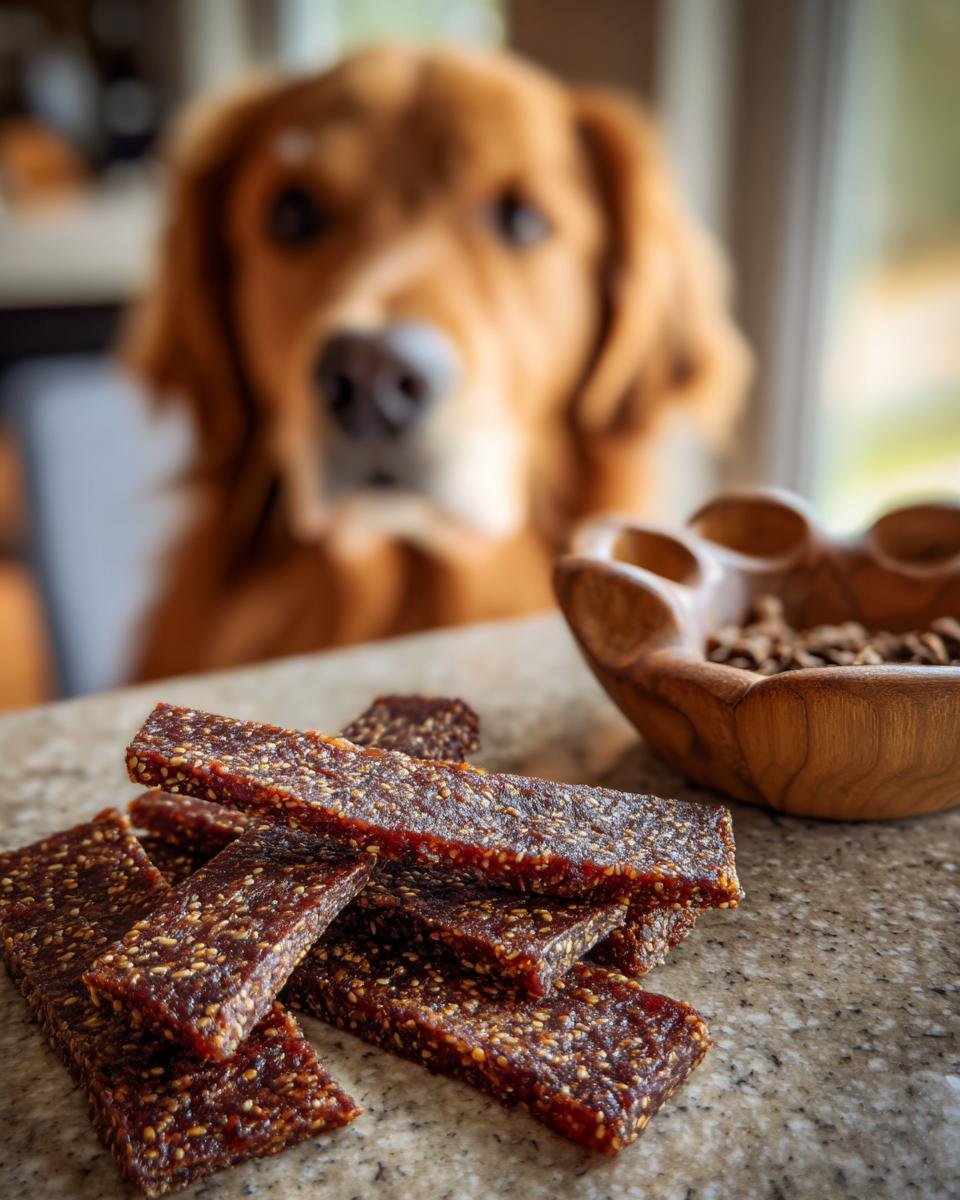
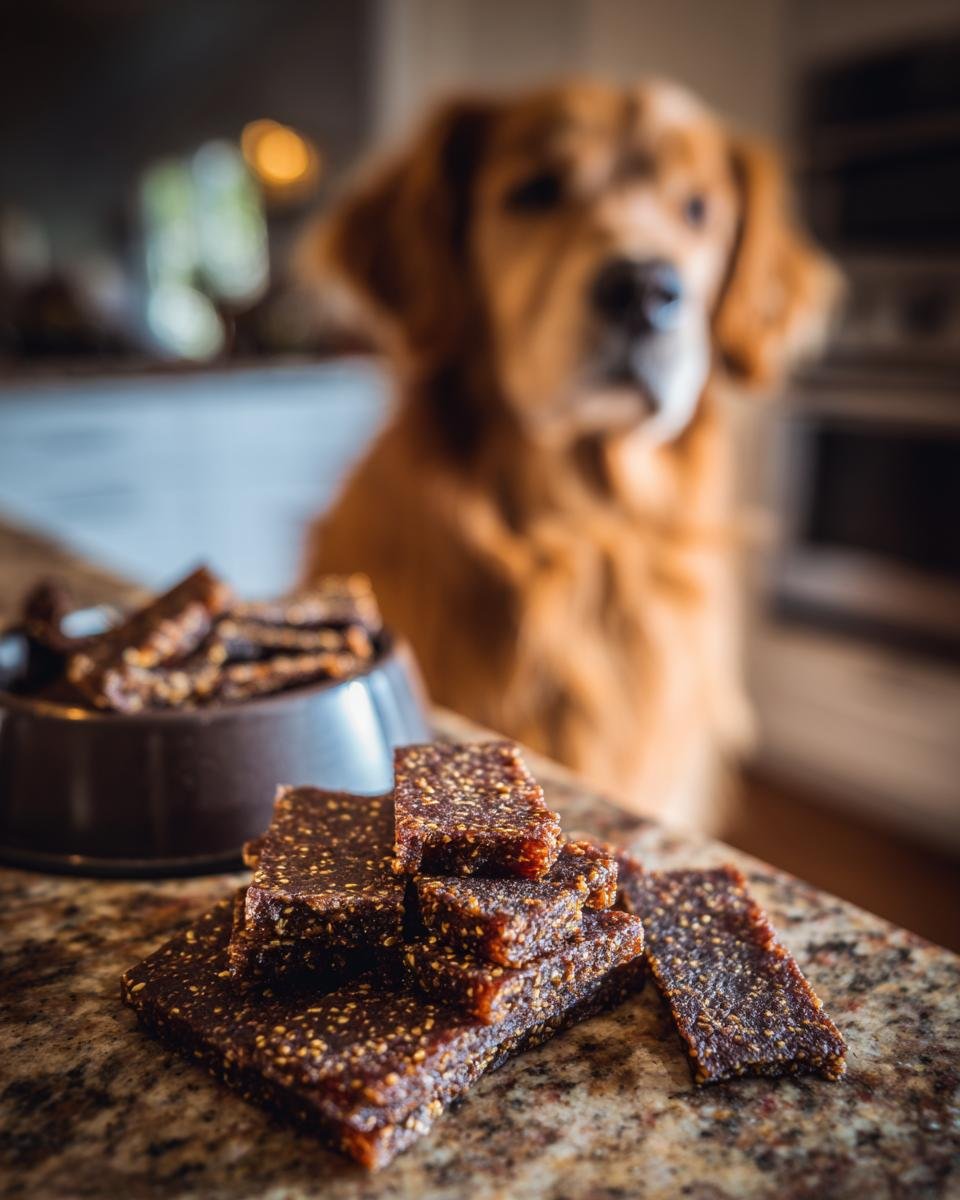
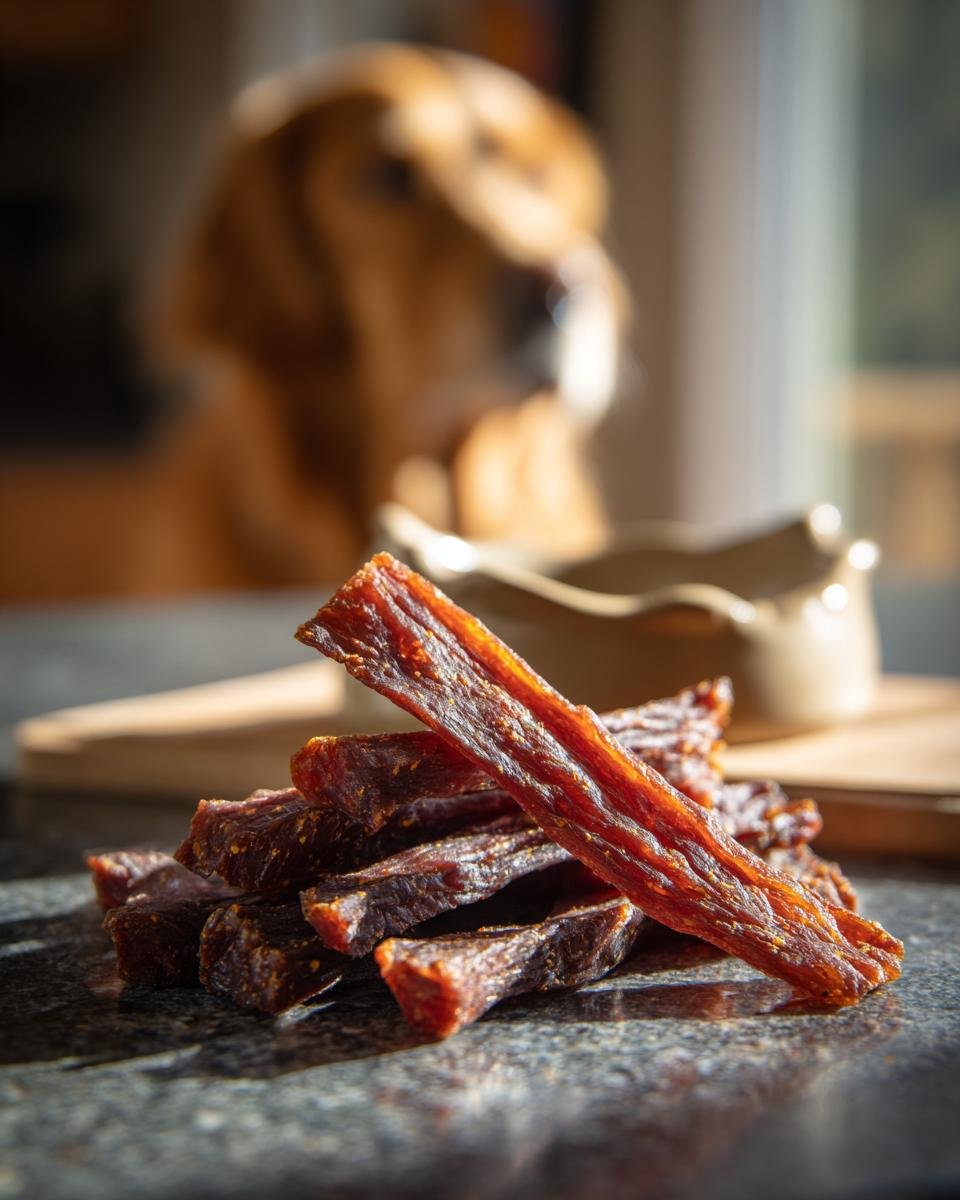
There’s just something about homemade jerky, right? That satisfying chew, the burst of flavor… it’s the ultimate grab-and-go snack! Lately, I’ve been obsessed with jazzing things up, and my new obsession is this incredible Beef Quinoa Power Jerky. It takes all the goodness of traditional jerky and then kicks it up a notch with the protein power of quinoa. Trust me, when I first tried making this, I was a little skeptical, but wow, the texture and the extra nutritional punch are a game-changer. It’s become my go-to for hiking trips and those crazy busy days!
Why You’ll Love This Beef Quinoa Power Jerky
Get ready for a snack that’s seriously good for you and tastes amazing:
- Super High Protein: Packed with beef *and* quinoa, this jerky will keep you full and energized.
- Nutrient-Dense Goodness: It’s not just protein; you get bonus vitamins and minerals from the quinoa!
- So Easy to Make: Seriously, you just mix, spread, and bake. Anyone can do it!
- Seriously Delicious: The savory, slightly sweet flavor is totally addictive. You won’t want to buy store-bought jerky again.
Essential Ingredients for Your Beef Quinoa Power Jerky
Alright, let’s get down to what you’ll need for this amazing Beef Quinoa Power Jerky. Don’t worry, it’s all pretty standard stuff you might even have in your pantry already!
- 1 pound lean ground beef: The star of the show! Make sure it’s lean – maybe 90/10 or even 93/7. This helps avoid making your jerky too greasy.
- 1/2 cup cooked quinoa: This is what makes it *power* jerky! Cook it up beforehand and let it cool. Any color quinoa works perfectly fine here.
- 1/4 cup low-sodium soy sauce: This brings the salty, savory base. I like low-sodium because jerky can get pretty salty on its own.
- 2 tablespoons Worcestershire sauce: A little splash adds this amazing umami depth that you just can’t beat.
- 1 tablespoon honey: Just a touch of sweetness to balance out all the savory notes. It also helps with that lovely chewy texture.
- 1 teaspoon garlic powder: For that classic, irresistible garlic punch.
- 1 teaspoon onion powder: Adds another layer of savory goodness.
- 1/2 teaspoon black pepper: A little kick to round things out.

Tips for Perfect Beef Quinoa Power Jerky
Making Beef Quinoa Power Jerky at home is pretty straightforward, but a few tricks can really make it shine! First off, when you’re grabbing your ground beef, definitely go for lean. I usually grab the 90% lean stuff, or even leaner if I can find it. Why? Because trust me, nobody wants greasy jerky! It’ll just end up not drying right and might get a bit… well, yucky. Using lean meat helps ensure your jerky dries out beautifully without all that excess fat interfering.
Getting the right consistency for spreading is also key. You want the mixture to be firm enough to hold its shape, but still spreadable. If it feels a little too wet, don’t panic! You can try adding a tiny bit more cooked quinoa or even a tablespoon of breadcrumbs to help absorb some moisture. And an oven that runs a bit hot or cool? It happens! My oven tends to run cooler, so I usually add an extra 30 minutes to the baking time. Keep an eye on it towards the end, and you’ll get a feel for when it’s perfectly dried. For more awesome snack ideas, check out my favorite energy bites – they’re another lifesaver on busy days!
Step-by-Step Guide to Making Beef Quinoa Power Jerky
Making this Beef Quinoa Power Jerky is as easy as 1-2-3-4 (and a little cooling!). You’ll be snacking on homemade goodness in no time!
Preheating and Preparation
First things first, crank up your oven to a nice, low 170°F (77°C). This low heat is key for drying out the jerky without cooking it too fast. Grab a baking sheet and line it with parchment paper – this stops everything from sticking and makes cleanup a breeze. This setup is crucial for perfect Beef Quinoa Power Jerky!
Combining the Ingredients
Now for the fun part! In a good-sized bowl, toss together your lean ground beef, that pre-cooked quinoa, soy sauce, Worcestershire sauce, honey, garlic powder, onion powder, and black pepper. Get your hands in there (or use a sturdy spoon) and mix it all up until it’s super well-combined. You want everything evenly distributed so every bite of your Beef Quinoa Power Jerky has that amazing flavor.
Spreading the Mixture
Once everything’s happily mixed, spread this glorious mixture evenly onto your parchment-lined baking sheet. Aim for a thin, even layer, about 1/4 inch thick. You don’t want it too thick, or it’ll take forever to dry out. Think of it like spreading frosting, but savory!
Baking Your Beef Quinoa Power Jerky
Pop that baking sheet into your preheated oven. Now, the waiting game begins! You’ll bake it for about 4 to 6 hours. The exact time really depends on your oven and how thick you spread it. You’ll know it’s ready when the jerky is dry and feels firm to the touch.
Cooling and Cutting
Once it’s perfectly dried, carefully take the baking sheet out of the oven. Let the Beef Quinoa Power Jerky cool completely right there on the sheet. This is important! Once it’s cool, you can break it into strips or cut it into whatever bite-sized pieces you like. Easy peasy!
Ingredient Notes and Substitutions for Beef Quinoa Power Jerky
Okay, so let’s chat about the ingredients for this Beef Quinoa Power Jerky for a sec. Using that lean ground beef, like 90% or even 93% lean, is honestly the biggest game-changer. It makes sure you don’t end up with a greasy mess that doesn’t dry properly. If you *only* have regular ground beef, no worries, just be extra diligent about draining off any excess fat after you mix everything.
Now, if you need to go gluten-free, tamari is a fantastic substitute for the soy sauce – it has a similar salty depth. And for those who like a little heat? Oh boy, do I have a tip! Toss in about 1/2 teaspoon of red pepper flakes when you’re mixing everything. It gives the Beef Quinoa Power Jerky a little kick that’s just *chef’s kiss*!
Storing Your Homemade Beef Quinoa Power Jerky
Alright, you’ve made this amazing Beef Quinoa Power Jerky, and now you want it to last, right? The best way to keep it tasting fantastic is to store it in an airtight container. Pop it on the counter and it should be good for about two weeks. If you want it to last even longer, definitely tuck it away in the refrigerator – it can hang out in there for a good month or even more!
Frequently Asked Questions about Beef Quinoa Power Jerky
Got questions about making your own Beef Quinoa Power Jerky? I’ve got answers!
Can I use a dehydrator instead of an oven?
Absolutely! If you have a dehydrator, that’s actually my preferred method for the best texture. Just follow your dehydrator’s instructions for making jerky. It usually involves a similar low temperature, around 160°F (71°C), but the drying time might be a bit shorter, usually 4-5 hours. Keep an eye on it!
How do I make sure my jerky isn’t too tough?
The key to avoiding overly tough jerky is really in the baking time and not spreading the mixture too thin. You want it dry and firm, but still have a little bit of chew. If it feels brittle, you’ve likely baked it a little too long. Always err on the side of slightly less time and check it every 30 minutes towards the end.
Can I use a different type of meat besides beef?
While this recipe is awesome with beef, you can definitely experiment! Turkey or chicken breast would work well, but you’ll want to make sure it’s super lean. Just remember that different meats have different moisture contents, so your baking time might need adjusting. I haven’t tried it with anything else, but you can always reach out if you have questions after trying it – feel free to contact me!
What if I don’t have honey?
No honey? Bummer, but I’ve got you covered! Maple syrup or even a tablespoon of brown sugar can totally work as a substitute. It’ll still give you that little touch of sweetness needed to balance out the savory flavors in your Beef Quinoa Power Jerky. Just add it in with the other wet ingredients and mix well.
Nutritional Information for Beef Quinoa Power Jerky
Now, let’s talk numbers for our delicious Beef Quinoa Power Jerky! Keep in mind these are estimates because, you know, homemade cooking can vary a tiny bit. But based on the ingredients and amounts, here’s what you can expect per serving:
- Serving Size: About 1 ounce
- Calories: Around 150
- Protein: A whopping 18g!
- Fat: Roughly 5g
- Carbohydrates: About 8g
- Sugar: Around 3g
It’s a fantastic way to get a protein boost without a ton of sugar or fat. Pretty great, huh?
Print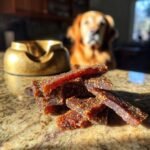
Beef Quinoa Power Jerky
- Total Time: 6 hours 15 min
- Yield: Approximately 1 pound 1x
- Diet: Low Fat
Description
A high-protein, nutrient-dense jerky made with beef and quinoa.
Ingredients
- 1 pound lean ground beef
- 1/2 cup cooked quinoa
- 1/4 cup soy sauce
- 2 tablespoons Worcestershire sauce
- 1 tablespoon honey
- 1 teaspoon garlic powder
- 1 teaspoon onion powder
- 1/2 teaspoon black pepper
Instructions
- Preheat your oven to 170°F (77°C). Line a baking sheet with parchment paper.
- In a bowl, combine the ground beef, cooked quinoa, soy sauce, Worcestershire sauce, honey, garlic powder, onion powder, and black pepper. Mix well until all ingredients are evenly distributed.
- Spread the mixture evenly onto the prepared baking sheet in a thin layer, about 1/4 inch thick.
- Bake for 4-6 hours, or until the jerky is dry and firm. The cooking time will vary depending on your oven and the thickness of the jerky.
- Once baked, remove the jerky from the oven and let it cool completely on the baking sheet.
- Break or cut the jerky into desired pieces. Store in an airtight container at room temperature for up to 2 weeks, or in the refrigerator for longer storage.
Notes
- For a spicier jerky, add 1/2 teaspoon of red pepper flakes to the mixture.
- Ensure your ground beef is lean to prevent excessive grease during the drying process.
- You can use a dehydrator instead of an oven for this recipe. Follow the manufacturer’s instructions for jerky.
- Prep Time: 15 min
- Cook Time: 4-6 hours
- Category: Snack
- Method: Baking
- Cuisine: American
Nutrition
- Serving Size: 1 ounce
- Calories: 150
- Sugar: 3g
- Sodium: 400mg
- Fat: 5g
- Saturated Fat: 2g
- Unsaturated Fat: 3g
- Trans Fat: 0g
- Carbohydrates: 8g
- Fiber: 1g
- Protein: 18g
- Cholesterol: 60mg
Keywords: beef jerky, quinoa jerky, power jerky, high protein snack, homemade jerky, healthy snack, beef and quinoa